Apple Caramel Cheesecake
This apple caramel cheesecake is a bit of work, but it easily makes up for its in looks and taste. There's nothing better than the texture contrast of the creamy cheesecake, the semi-soft sautéed apples, and the slight crunch from the crust. This cheesecake is big on flavor. It's full of the robust spices and flavors we expect from the Fall season. As I said, it's a bit of work, but when you take one bite, you'll melt into such pure bliss that you won't even care.
REASONS YOU SHOULD TRY THIS RECIPE:
- so big on flavor and perfect during the fall season
- creamy and rich cheesecake filling topped with homemade apple topping
- caramel sauce drizzle on top for the perfect bite

HOW TO MAKE APPLE CARAMEL CHEESECAKE:
Apple Topping
- Wash, peel, and slice the apples around the core until you get three or four large apple pieces from each apple. Cut the large apple pieces into ½" slices. Dice those slices into medium-sized pieces.


- Place the diced apples, salt, lemon juice/zest, granulated sugar, and butter in a saucepan over medium to medium-high heat. Stir and cook for a few minutes.
- Stir in the cinnamon and nutmeg. In a separate small bowl, whisk together the cornstarch and apple cider. Pour this slurry mixture in with the apple mixture. Stir this mixture and cook for another 10-15 minutes or until al dente. The apples should be cooked fully but they'll still have a little bit of a bite to them.

- Once the apples reach that stage and the sauce is thicker, take the pot off the heat and add in the vanilla extract. Stir until combined. Pour the apple filling into a shallow dish, "goo" included.

- Allow the mixture to cool at room temperature for 30 minutes. Cover in plastic wrap and allow it to cool overnight in the fridge.

Crust
- For the crust, combine the ingredients in a large bowl. Toss with the melted butter and mix until combined and the mixture looks like wet sand when crunched together.


- Pour the crust mixture into a prepared 10" cake pan that is lined with a parchment circle and is sprayed well with cooking spray or greased well with pan grease.
- Begin to flatten the crust into the pan around the inside and the sides. Use your hands to get it started and then move to a measuring cup to get the crust even and flat.

- Bake at 350°F for 10 minutes. Remove the pan from the oven and set it aside to cool while you work on the cheesecake.
Filling
- In your stand mixer fitted with a paddle, begin to cream the cream cheese on the lowest speed setting for about five minutes. Stop the mixer and scrape the bowl and paddle.

- Combine the granulated sugar, cinnamon, nutmeg, and salt in a bowl. Gradually add in the sugar mixture all at once. Continue to mix until the mixture is smooth. Make sure to keep it on the low-speed setting to ensure we don't incorporate air into the mixture. Once smooth, stop the mixer and scrape the bowl down well.

- Add the sour cream and mix until smooth. Stop the mixer and scrape down.
- Add the eggs in four additions along with the vanilla extract. Scrape the bowl and paddle thoroughly between each addition. Mix thoroughly after each addition on low speed.
- Add the heavy cream in slowly, along with the lemon zest and juice. Scrape down and mix until incorporated. Give it a final scrape and mix until there are no more lumps in the batter.
- Pour the cheesecake batter into the crust. Lightly tap the pan on the counter to allow excess air bubbles to escape.

- Place the pan into a larger shallow pan. Pour the boiling water around the sides of the pan to create a water bath.

Baking
- Place the pan into a preheated oven and bake at 350°F for 30 minutes, then turn down the heat to 325°F and bake for another 35 minutes. (Don't open the oven door as continuing to do so may result in cracks in your cheesecake!)
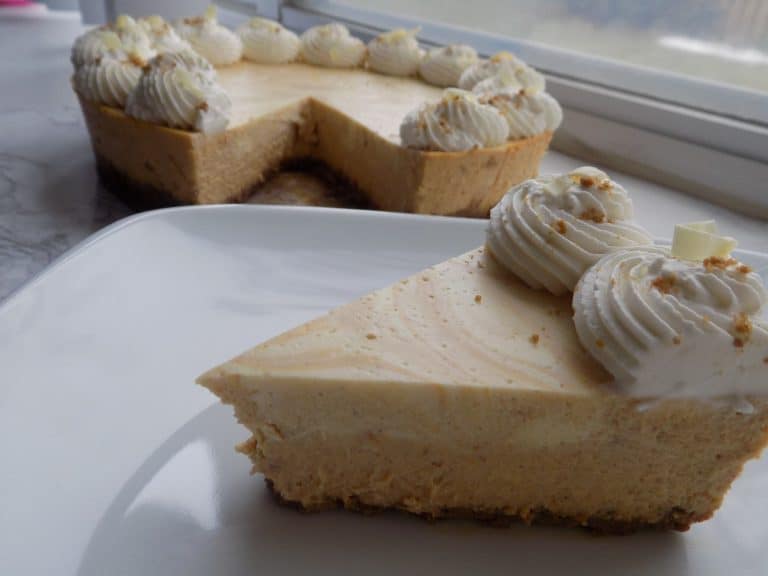
- Leaving the pan in the oven, turn the oven off and allow the cheesecake to continue to cook residually with the oven door closed for another 20 minutes. Then, carefully take the pan out of the oven and remove the pan from the water bath. The cheesecake will be done when the outside is set, but the center is still jiggly. Though it'll be jiggly, it won't be liquid. You should be able to gently touch the center without it being liquid. Set the cheesecake aside and allow it to cool at room temperature for half an hour. (My cheesecake has a swirl because I added the vanilla last second while in the oven, so yours won't have the same look.)

- Cover the pan with aluminum foil ensuring the foil doesn't touch the surface of the cheesecake...like mine did. No worries if it does since we're covering the top anyway. Place in the fridge and allow it to cool for 24 hours.
- The next day, take the cake out of the fridge. If there is any water from the condensation that dripped on top of your cheesecake, use a clean paper towel to gently dab it off. You can unmold the cheesecake in two ways. Dip the pan into another shallow pan filled with boiling water. Make sure to gently spin the cheesecake pan and continue to do this for a few minutes. Then use a cake board to flip the cake onto the board and unmold it. Use another cake board to flip it right-side up.
- You can also use a blowtorch on a medium setting to torch the sides of the pan. Then use a cake board to flip the cake. Torch the top (which is the bottom crust). Unmold the cake gently and use another cake board to flip it right-side up.


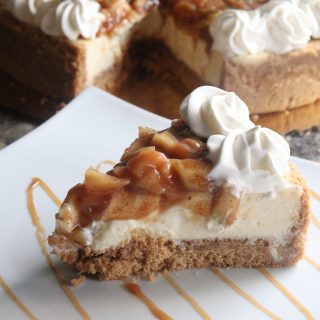
- Take the apple filling out of the fridge and gently spoon it over the cake. Use a large spoon or an offset spatula to spread the filling across the top. Leave about a ¼" off the sides. Optionally, you can pipe rosettes of homemade whipped cream and you can drizzle some salted caramel sauce over the top of the apple filling. You can get creative and decorate it as you wish. Serve it up and enjoy!


SOME MORE GREAT CHEESECAKE RECIPES:
Apple Caramel Cheesecake
A perfect Fall cheesecake that is rich, creamy, and full of robust flavors.
Ingredients
Apple Pie Topping:
- 2 lbs apples medium diced (granny smith, fuji, honeycrisp are all good options)
- 1 ¼ oz unsalted butter room temp
- 6.5 oz granulated sugar
- 0.6 oz salt
- 1 ½ teaspoon cinnamon
- ¼ teaspoon nutmeg
- 1 medium lemon juice and zest
- 2 oz apple cider
- ½ oz cornstarch
- 1 teaspoon vanilla
Cheesecake Crust
- 15 oz graham crackers crumbs
- 1 oz granulated sugar
- 1 teaspoon nutmeg
- 1 teaspoon pure maple syrup
- 1 tablespoon cinnamon
- ½ teaspoon salt
- 4.30 oz melted butter room temp (you may need a bit more or less butter)
Cheesecake
- 24 oz Philadelphia cream cheese room temp (Three 8 oz packages)
- 6 oz granulated sugar
- ¼ teaspoon salt
- ½ cup sour cream room temp
- 5 eggs room temp
- ½ tablespoon vanilla extract
- 1 cup heavy cream room temp
- 1 teaspoon cinnamon
- ¼ teaspoon nutmeg
- 1 medium lemon zest and juice
Water Bath
- 5-6 cups boiling water
Instructions
- Wash, peel, and slice the apples around the core until you get three or four large apple pieces from each apple. Cut the large apple pieces into ½" slices. Dice those slices into medium-sized pieces.
- Place the diced apples, salt, lemon juice/zest, granulated sugar, and butter in a saucepan over medium to medium-high heat. Stir and cook for a few minutes.
- Stir in the cinnamon and nutmeg. In a separate small bowl, whisk together the cornstarch and apple cider. Pour this slurry mixture in with the apple mixture. Stir this mixture and cook for another 10-15 minutes or until al dente. The apples should be cooked fully but they'll still have a little bit of a bite to them.
- Once the apples reach that stage and the sauce is thicker, take the pot off the heat and add in the vanilla extract. Stir until combined. Pour the apple filling into a shallow dish, "goo" included.
- Allow the mixture to cool at room temperature for 30 minutes. Cover in plastic wrap and allow it to cool overnight in the fridge.
- For the crust, combine the ingredients in a large bowl. Toss with the melted butter and mix until combined and the mixture looks like wet sand when crunched together.
- Pour the crust mixture into a prepared 10" cake pan that is lined with a parchment circle and is sprayed well with cooking spray or greased well with pan grease.
- Begin to flatten the crust into the pan around the inside and the sides. Use your hands to get it started and then move to a measuring cup to really get the crust even and flat.
- Bake at 350°F for 10 minutes. Remove the pan from the oven and set it aside to cool while you work on the cheesecake.
- In your stand mixer fitted with a paddle, begin to cream the cream cheese on the lowest speed setting for about five minutes. Stop the mixer and scrape the bowl and paddle.
- Combine the granulated sugar, cinnamon, nutmeg, and salt in a bowl. Gradually add in the sugar mixture all at once. Continue to mix until the mixture is smooth. Make sure to keep it on the low-speed setting to ensure we don't incorporate air into the mixture. Once smooth, stop the mixer and scrape the bowl down well.
- Add the sour cream and mix until smooth. Stop the mixer and scrape down.
- Add the eggs in four additions along with the vanilla extract. Scrape the bowl and paddle thoroughly between each addition. Mix thoroughly after each addition on low speed.
- Add the heavy cream in slowly, along with the lemon zest and juice. Scrape down and mix until incorporated. Give it a final scrape and mix until there are no more lumps in the batter.
- Pour the cheesecake batter into the crust. Lightly tap the pan on the counter to allow excess air bubbles to escape.
- Place the pan into a larger shallow pan. Pour the boiling water around the sides of the pan to create a water bath.
- Place the pan into a preheated oven and bake at 350°F for 30 minutes, then turn down the heat to 325°F and bake for another 35 minutes. (Don't open the oven door as continuing to do so may result in cracks in your cheesecake!)
- Leaving the pan in the oven, turn the oven off and allow the cheesecake to continue to cook residually with the oven door closed for another 20 minutes. Then, carefully take the pan out of the oven and remove the pan from the water bath. The cheesecake will be done when the outside is set, but the center is still jiggly. Though it'll be jiggly, it won't be liquid. You should be able to gently touch the center without it being liquid. Set the cheesecake aside and allow it to cool at room temperature for half an hour.
- Cover the pan with aluminum foil ensuring the foil doesn't touch the surface of the cheesecake...like mine did. No worries if it does since we're covering the top anyway. Place in the fridge and allow it to cool for 24 hours.
- The next day, take the cake out of the fridge. If there is any water from the condensation that dripped ontop of your cheesecake, use a clean paper towel to gently dab it off. You can unmold the cheesecake in two ways. Dip the pan into another shallow pan filled with boiling hot water. Make sure to gently spin the cheesecake pan and continue to do this for a few minutes. Then use a cake board to flip the cake onto the board and unmold. Use another cake board to flip it right-side up.
- You can also use a blowtorch on a medium setting to torch the sides of the pan. Then use a cake board to flip the cake. Torch the top (which is actually the bottom crust). Unmold the cake gently and use another cake board to flip it right-side up.
- Take the apple filling out of the fridge and gently spoon it over the cake. Use a large spoon or an offset spatula to spread the filling across the top. Leave about a ¼" off the sides. Optionally, you can pipe rosettes of homemade whipped cream and you can drizzle on some salted caramel sauce over the top of the apple filling. You can really get creative and decorate it as you wish. Serve it up and enjoy!
Video
Notes
You can use my salted caramel sauce recipe to drizzle ontop the top of the cheesecake or serve on the side.
Store covered in the fridge for up to 5 days, but it's best within the first three days. You can also freeze the cheesecake without the apple topping for up to a month. Let it thaw before serving.

