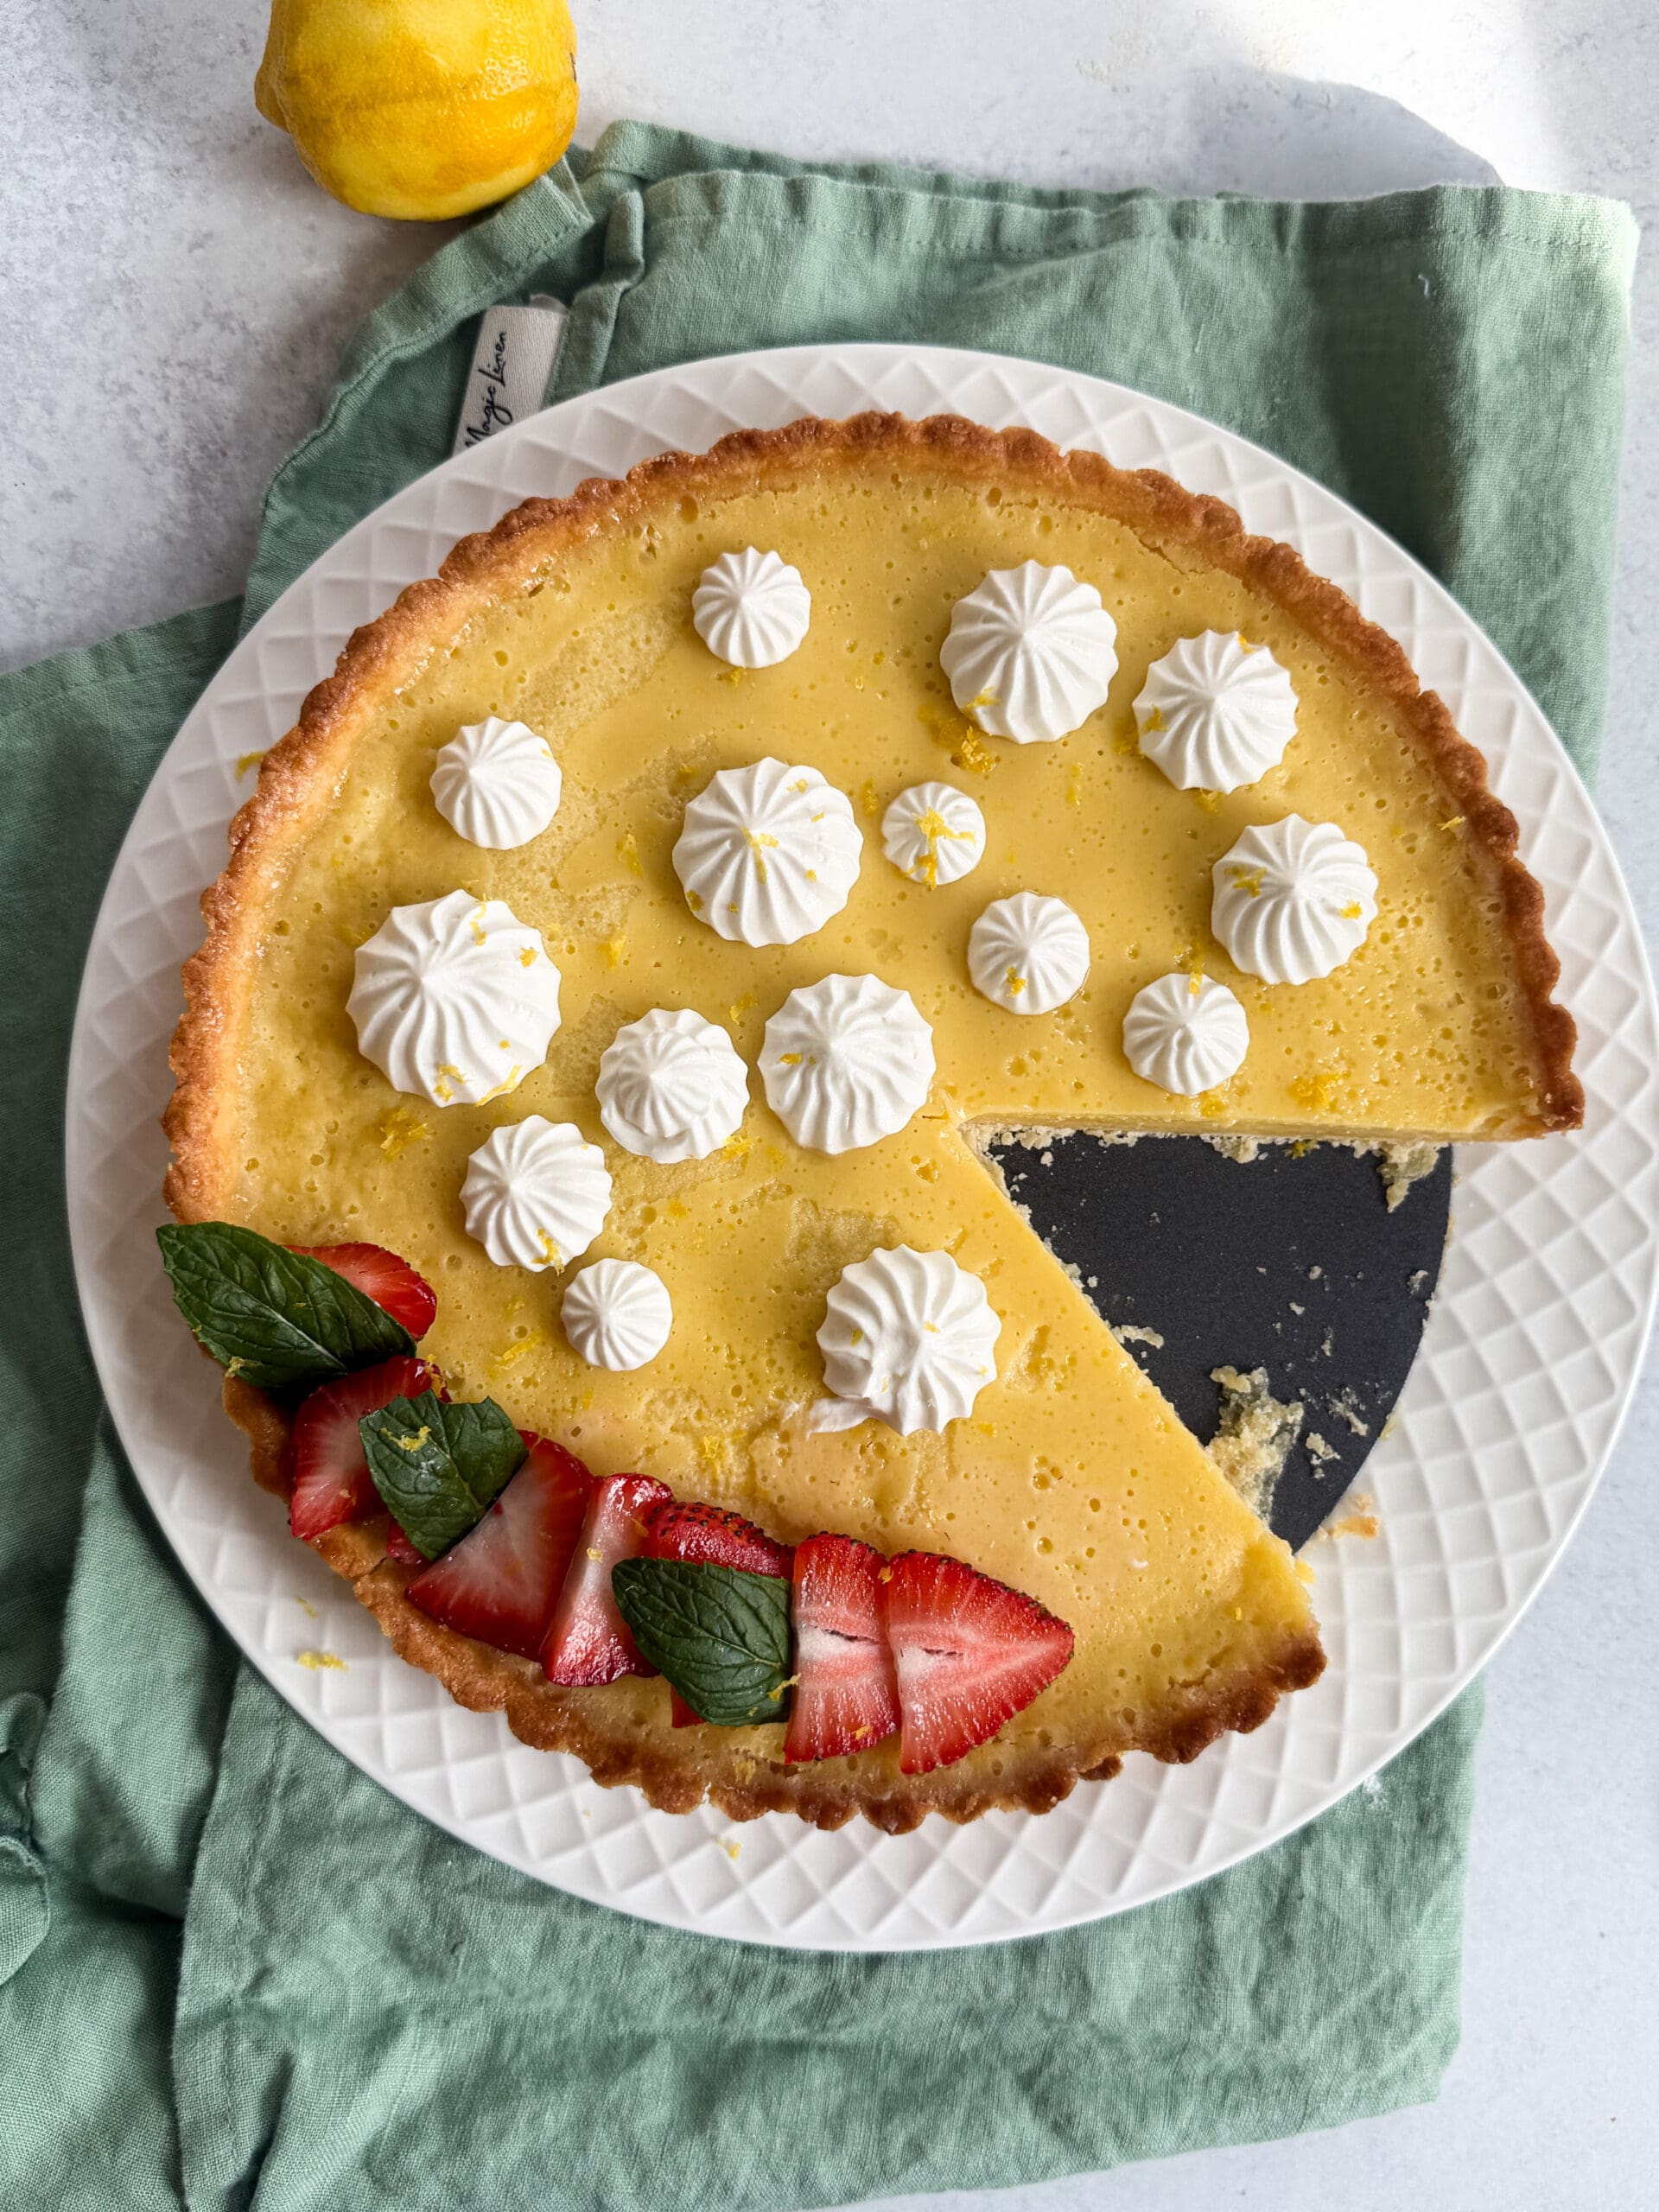
Classic Lemon Tart
Imagine this, spring is finally here, birds are chirping and bees are buzzing. The flowers are coming to life right before your eyes. What treat could better celebrate all this emerging life and beauty than a classic lemon tart.
Spring is when citrus is in style and I absolutely love using lemon in all things. The lemon in this tart brings out such a refreshing, vibrant element to every bite. When I first tried this recipe back in culinary school, I immediately knew it was one worth sharing.
This is a true classic lemon tart, with a bold, citrusy flavor that really shines. While the recipe does take a bit of time (mostly setting up in the fridge), the steps are simple and very easy to follow. In the end, you’re rewarded with a beautifully balanced dessert: a light, intensely lemony filling paired with a perfectly soft pastry crust. For me, it’s absolutely worth the effort.
Why You’ll Love This Recipe
What you’ll need for this recipe:
FAQs
How to Make Classic Lemon Tart
- Prep your tart pan by greasing it with butter and cooking spray. I didn’t find it necessary to use a parchment round as well, but you can if you’d like.
Crust:
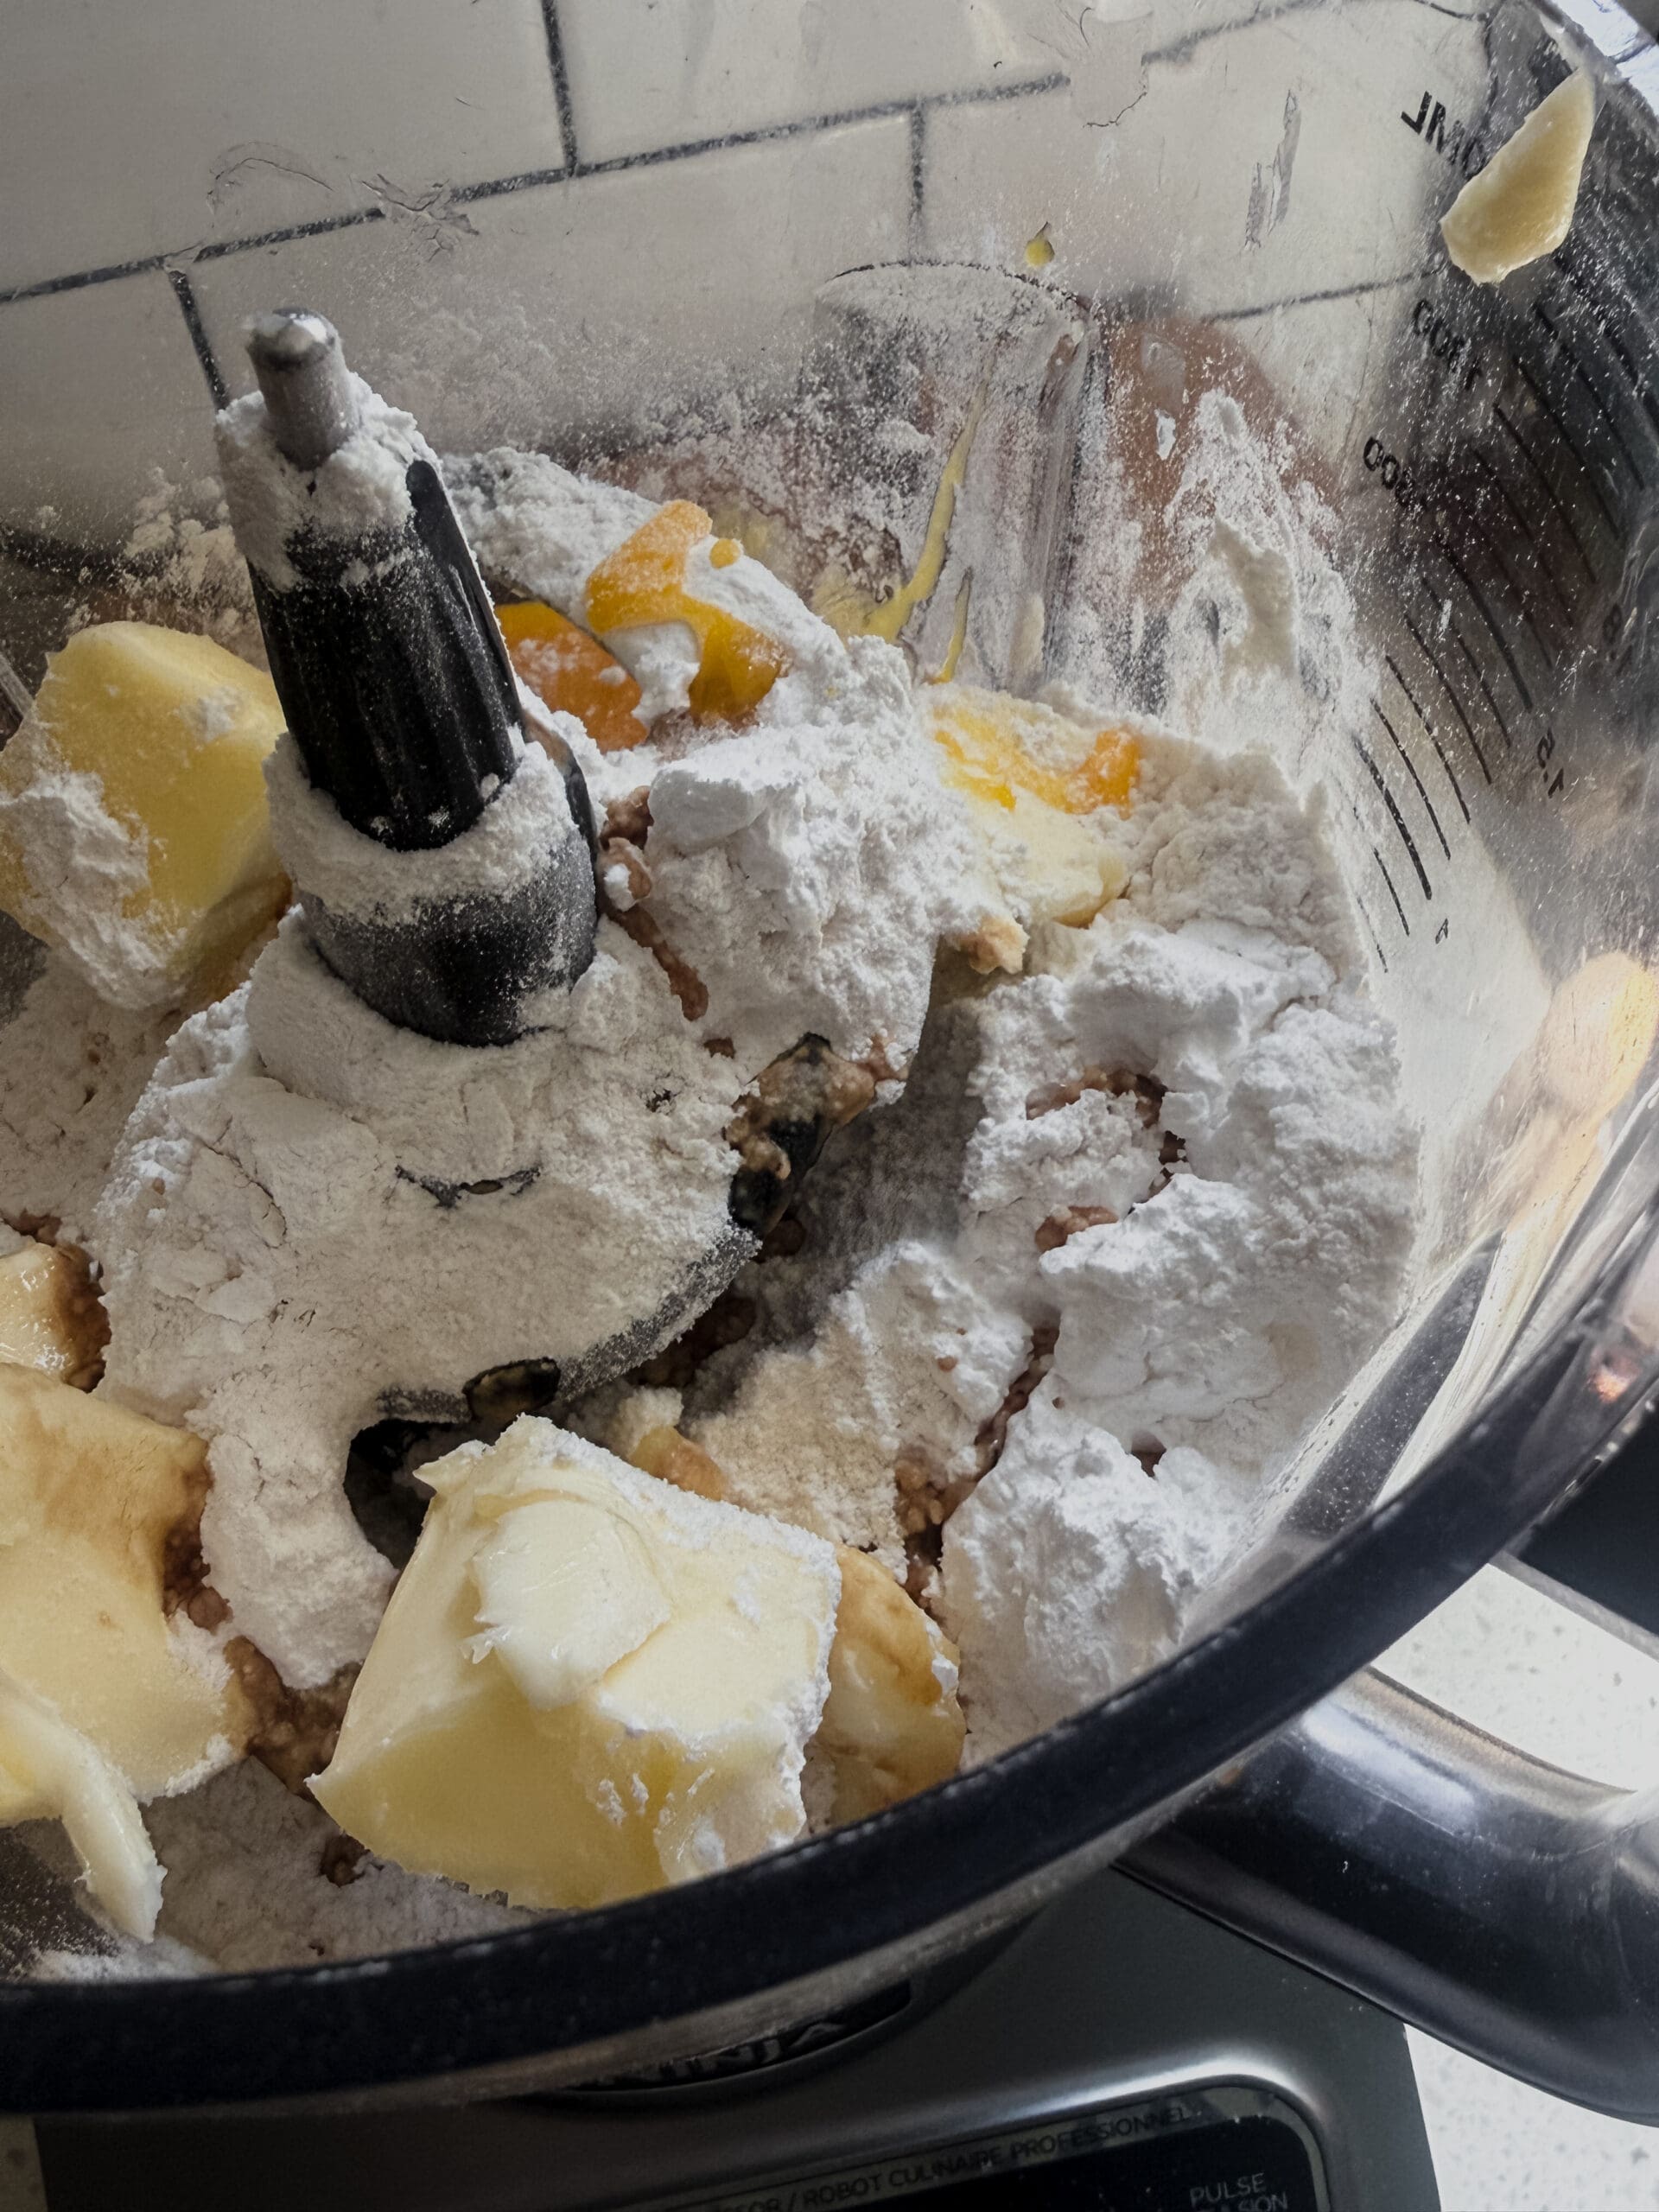
- For the crust, combine all the crust ingredients in your food processor and mix just until combined. Don’t overmix it. The mixture will still look very crumbly, but it will come together when we form it into a ball to refrigerate it, so don’t let that concern you.

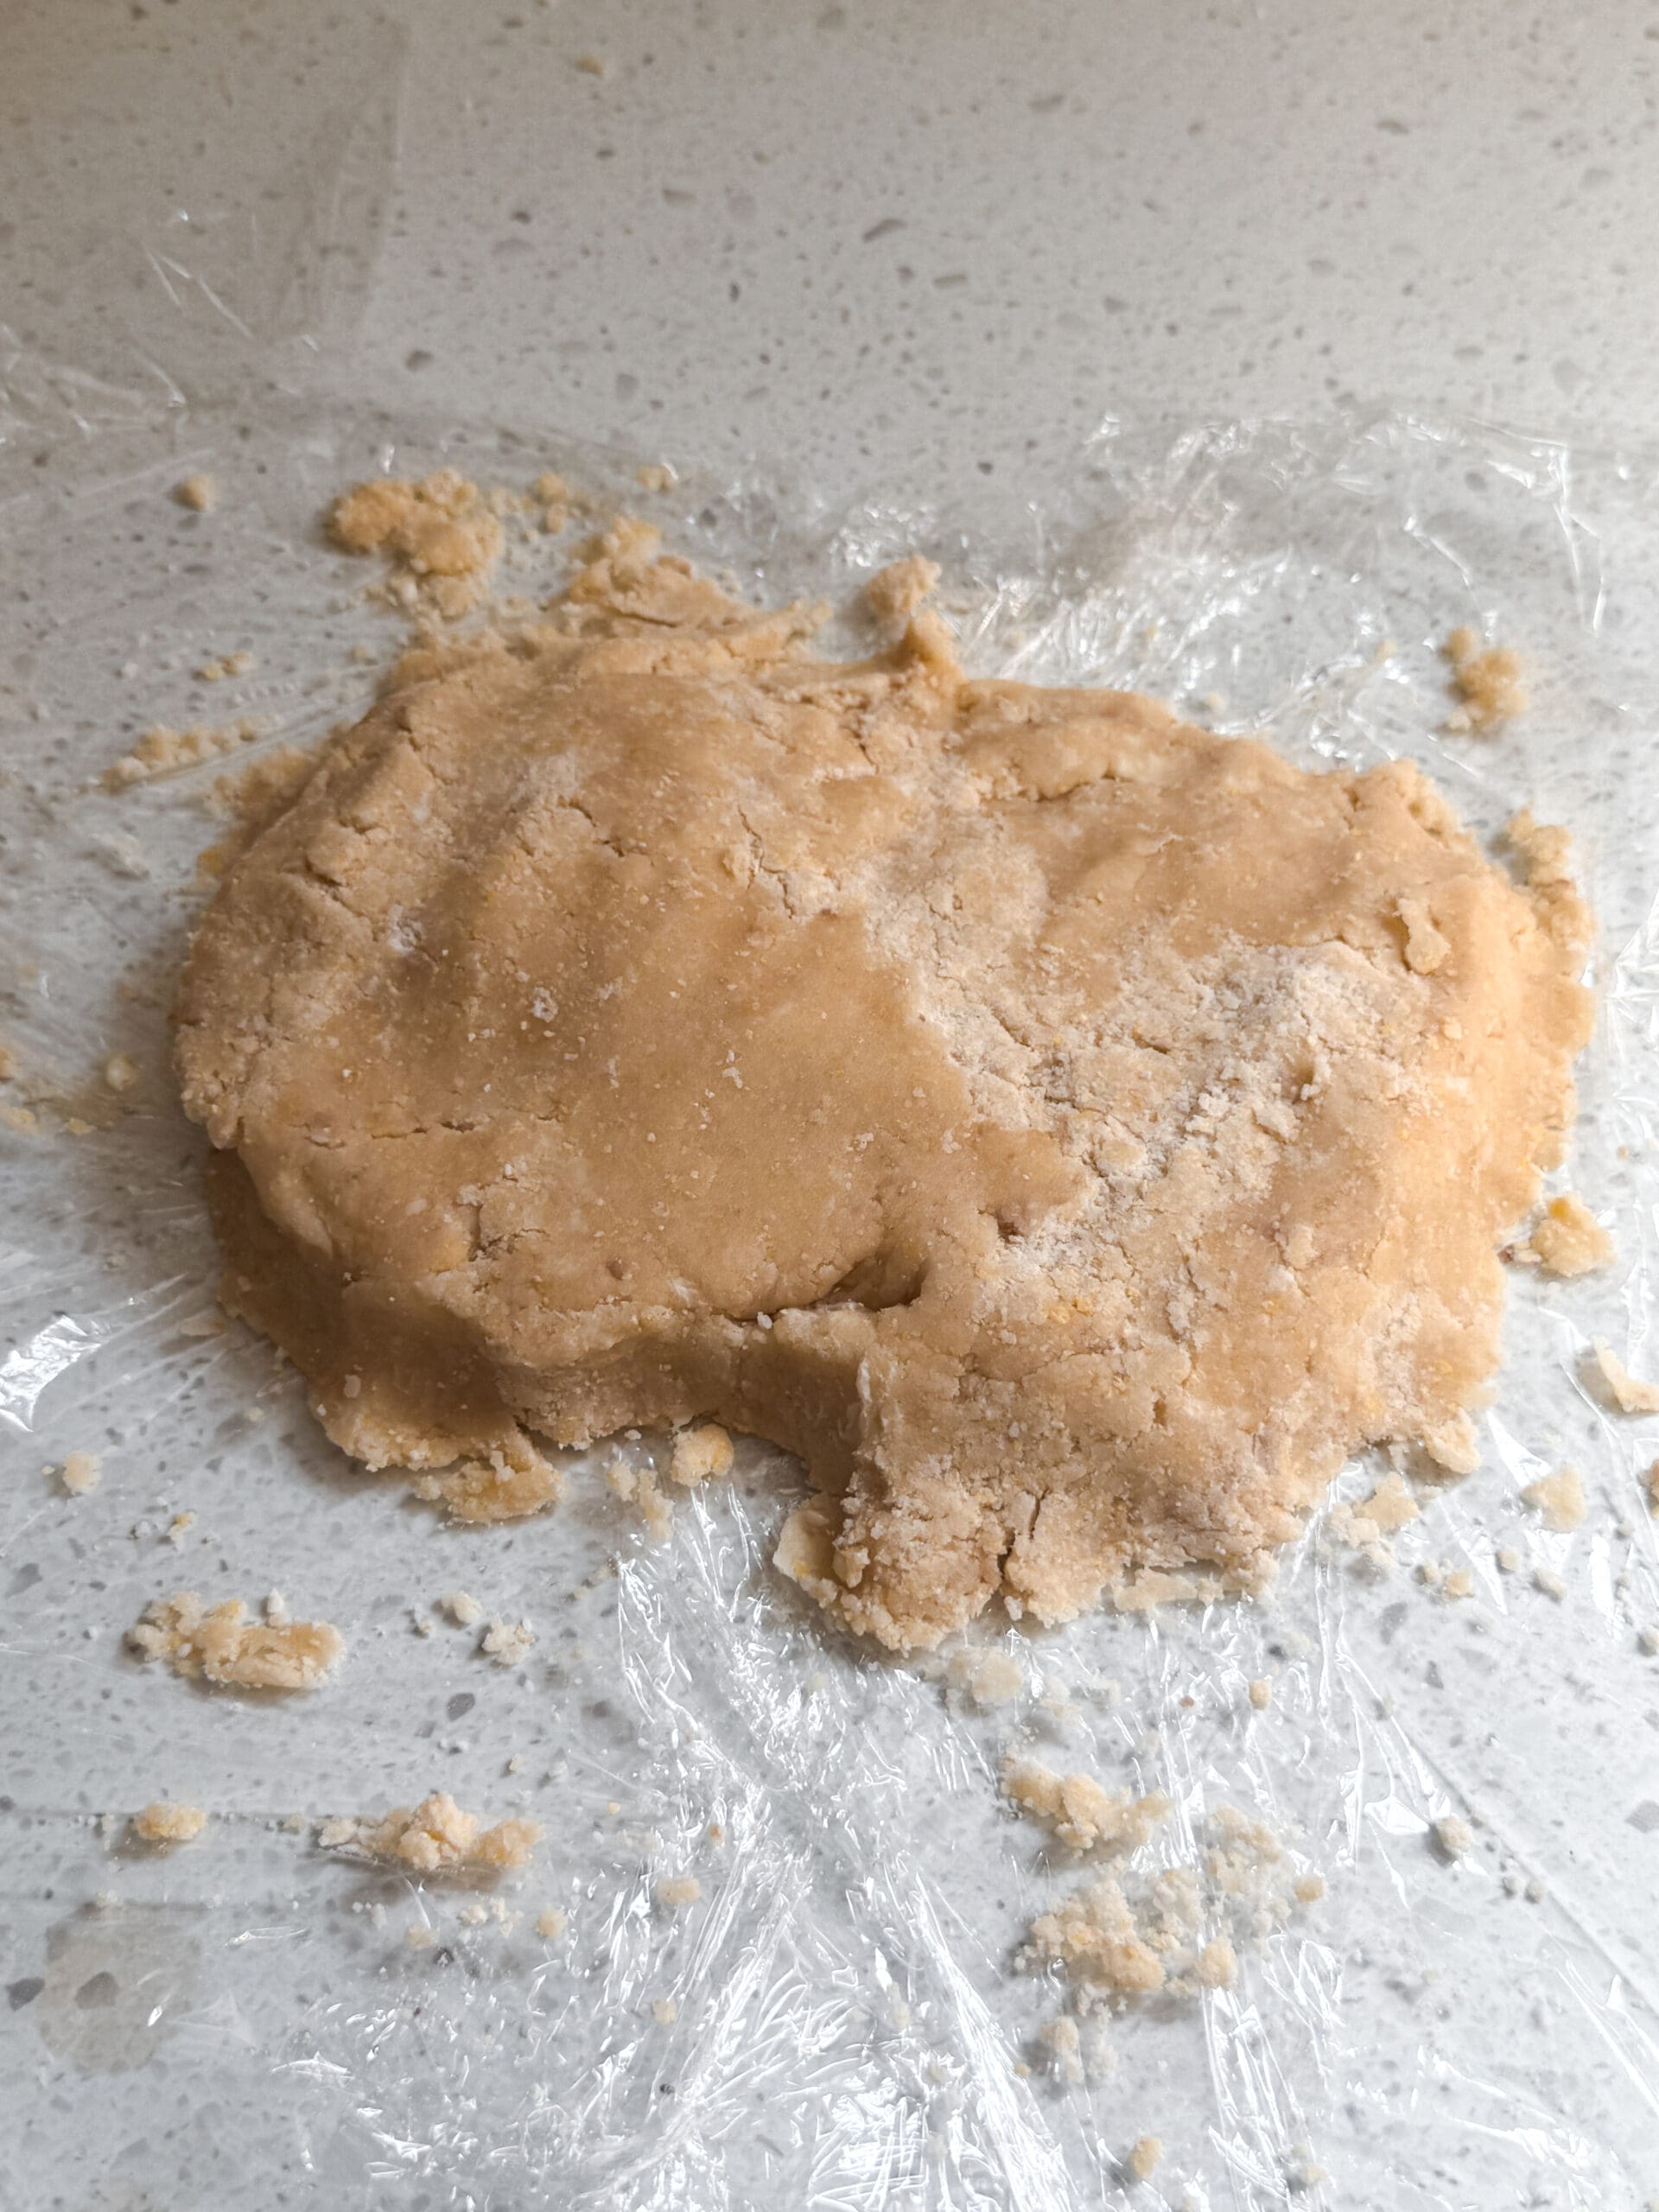
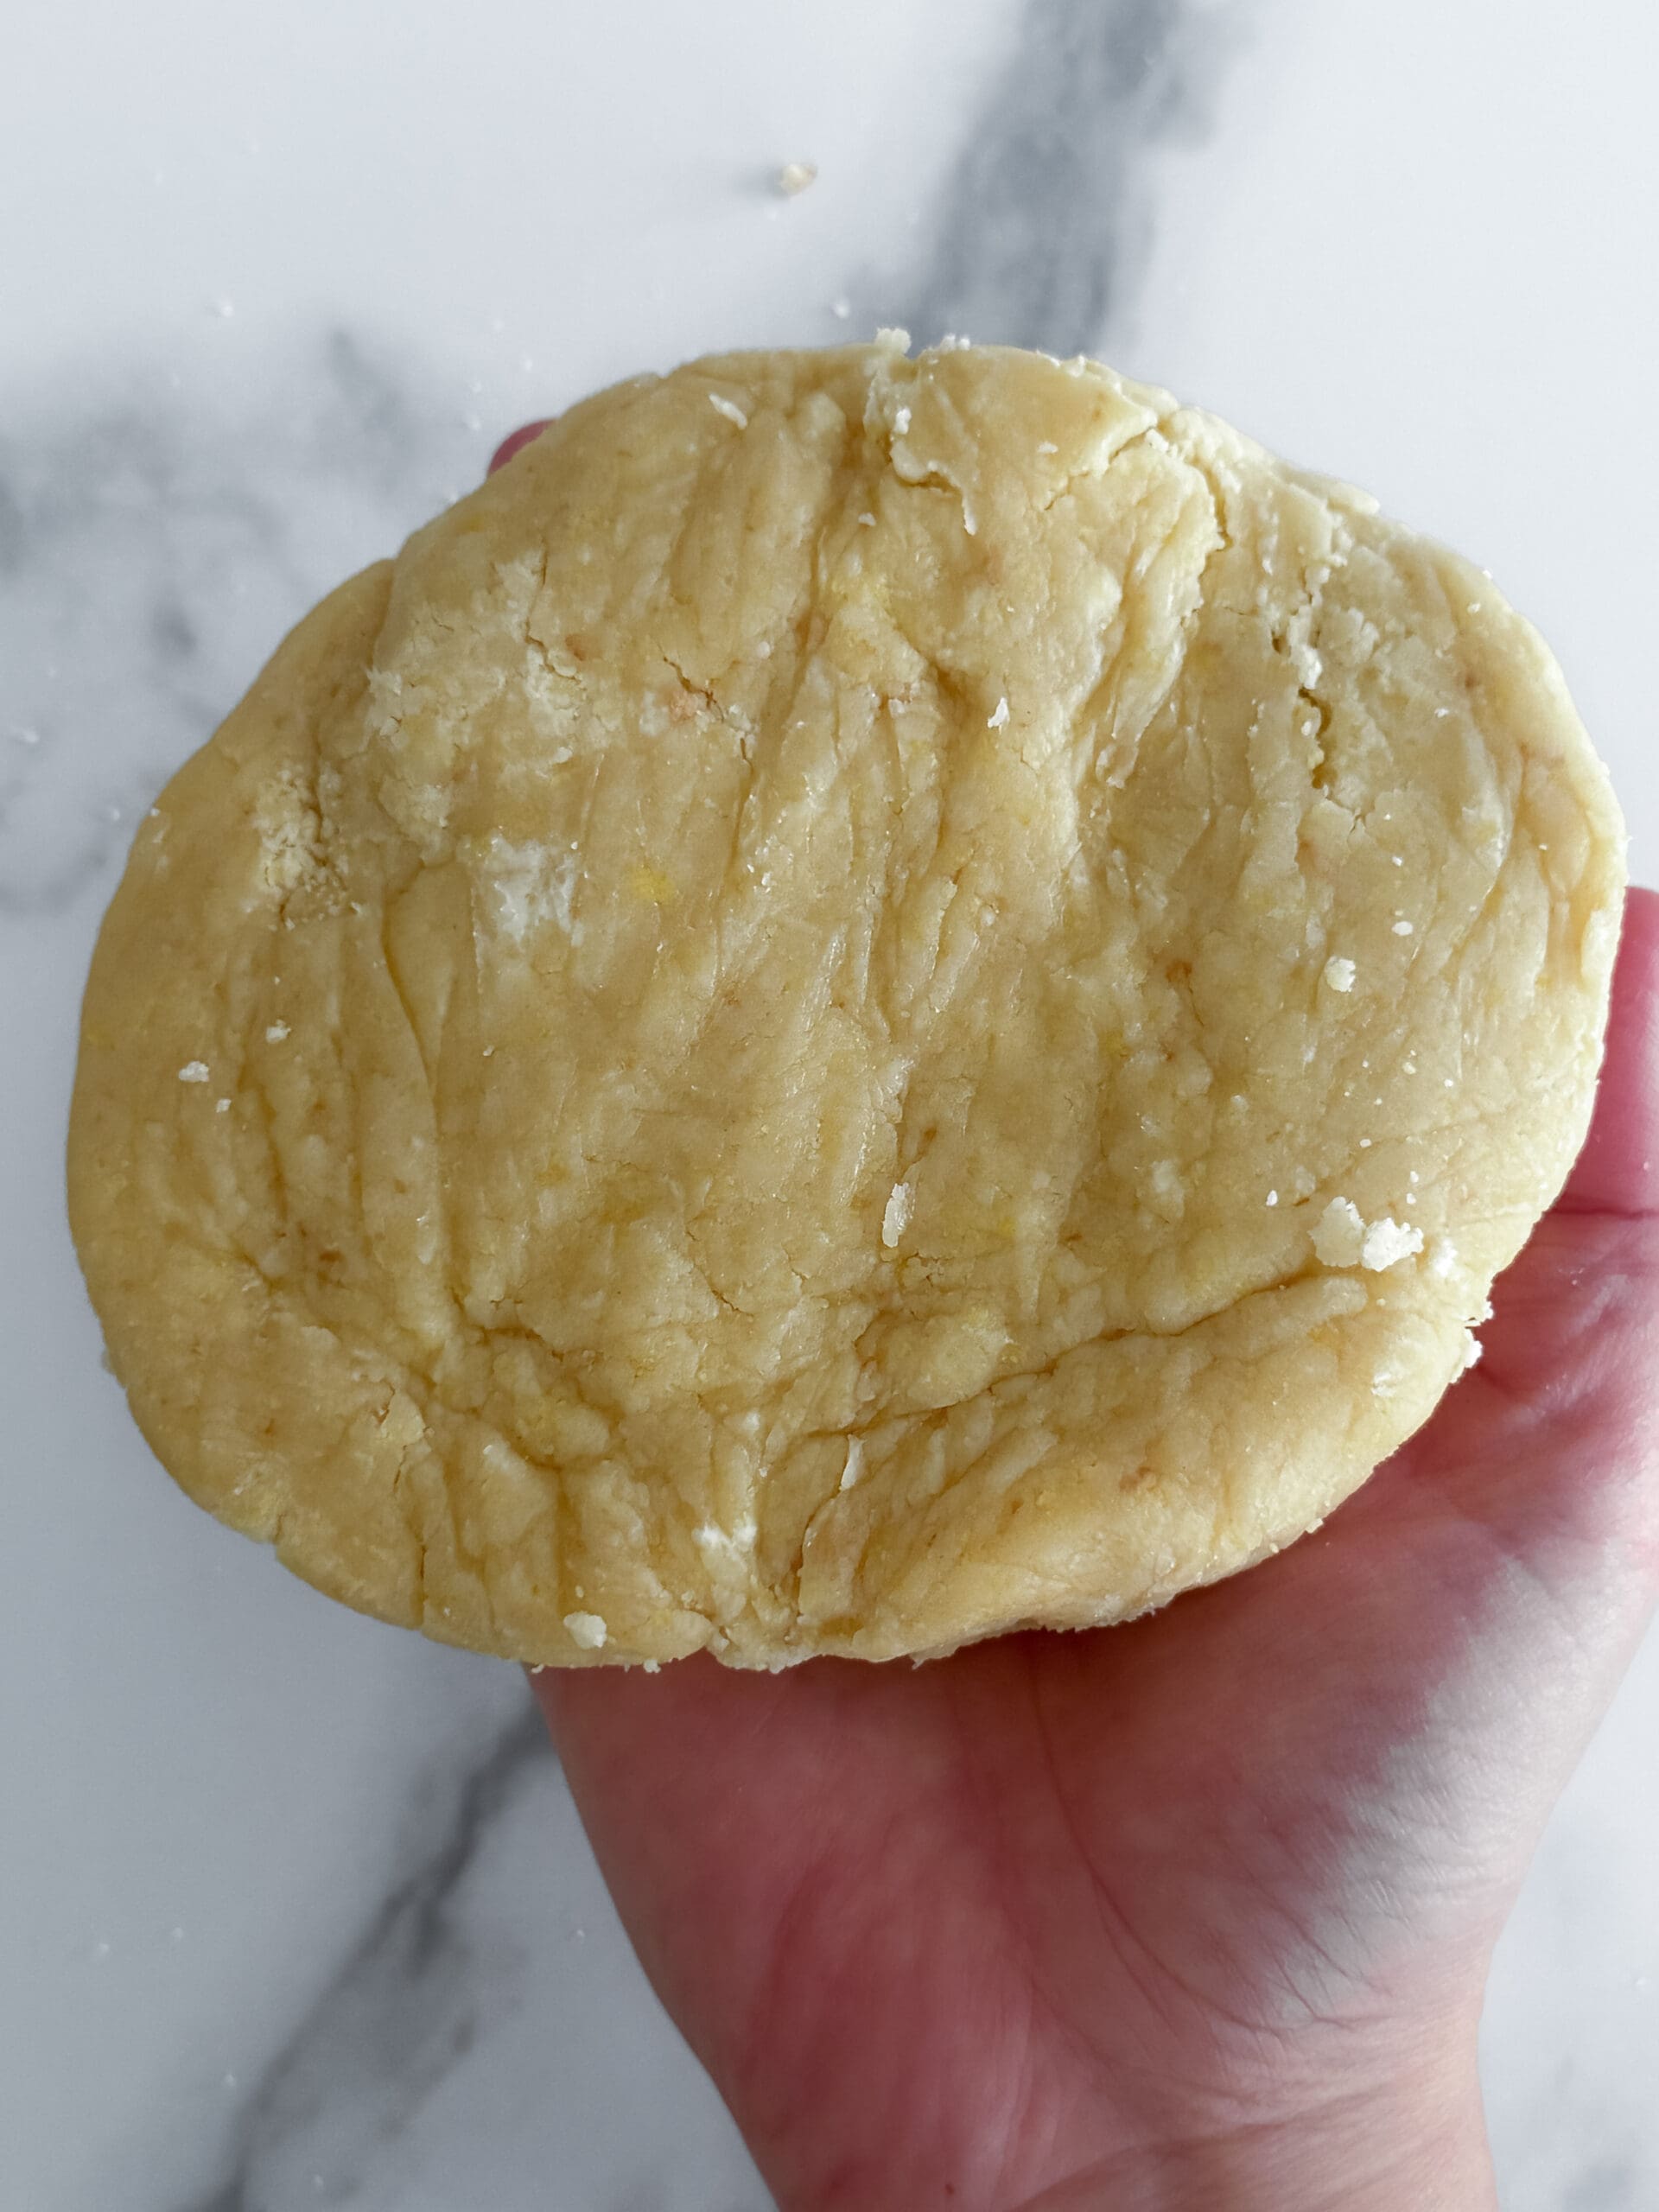
- Dump the mixture out onto a sheet of plastic wrap and begin to bring it together so it’s a ball. Forming it into a ball now will make it easier to roll out later. Make sure it’s fully enclosed in the plastic wrap and refrigerate for at least 30 minutes or one hour. This will allow the flour to absorb into the dough and let the dough relax, making for better flavor and making it easier to roll. In the meantime, turn your oven on to preheat at 400F.
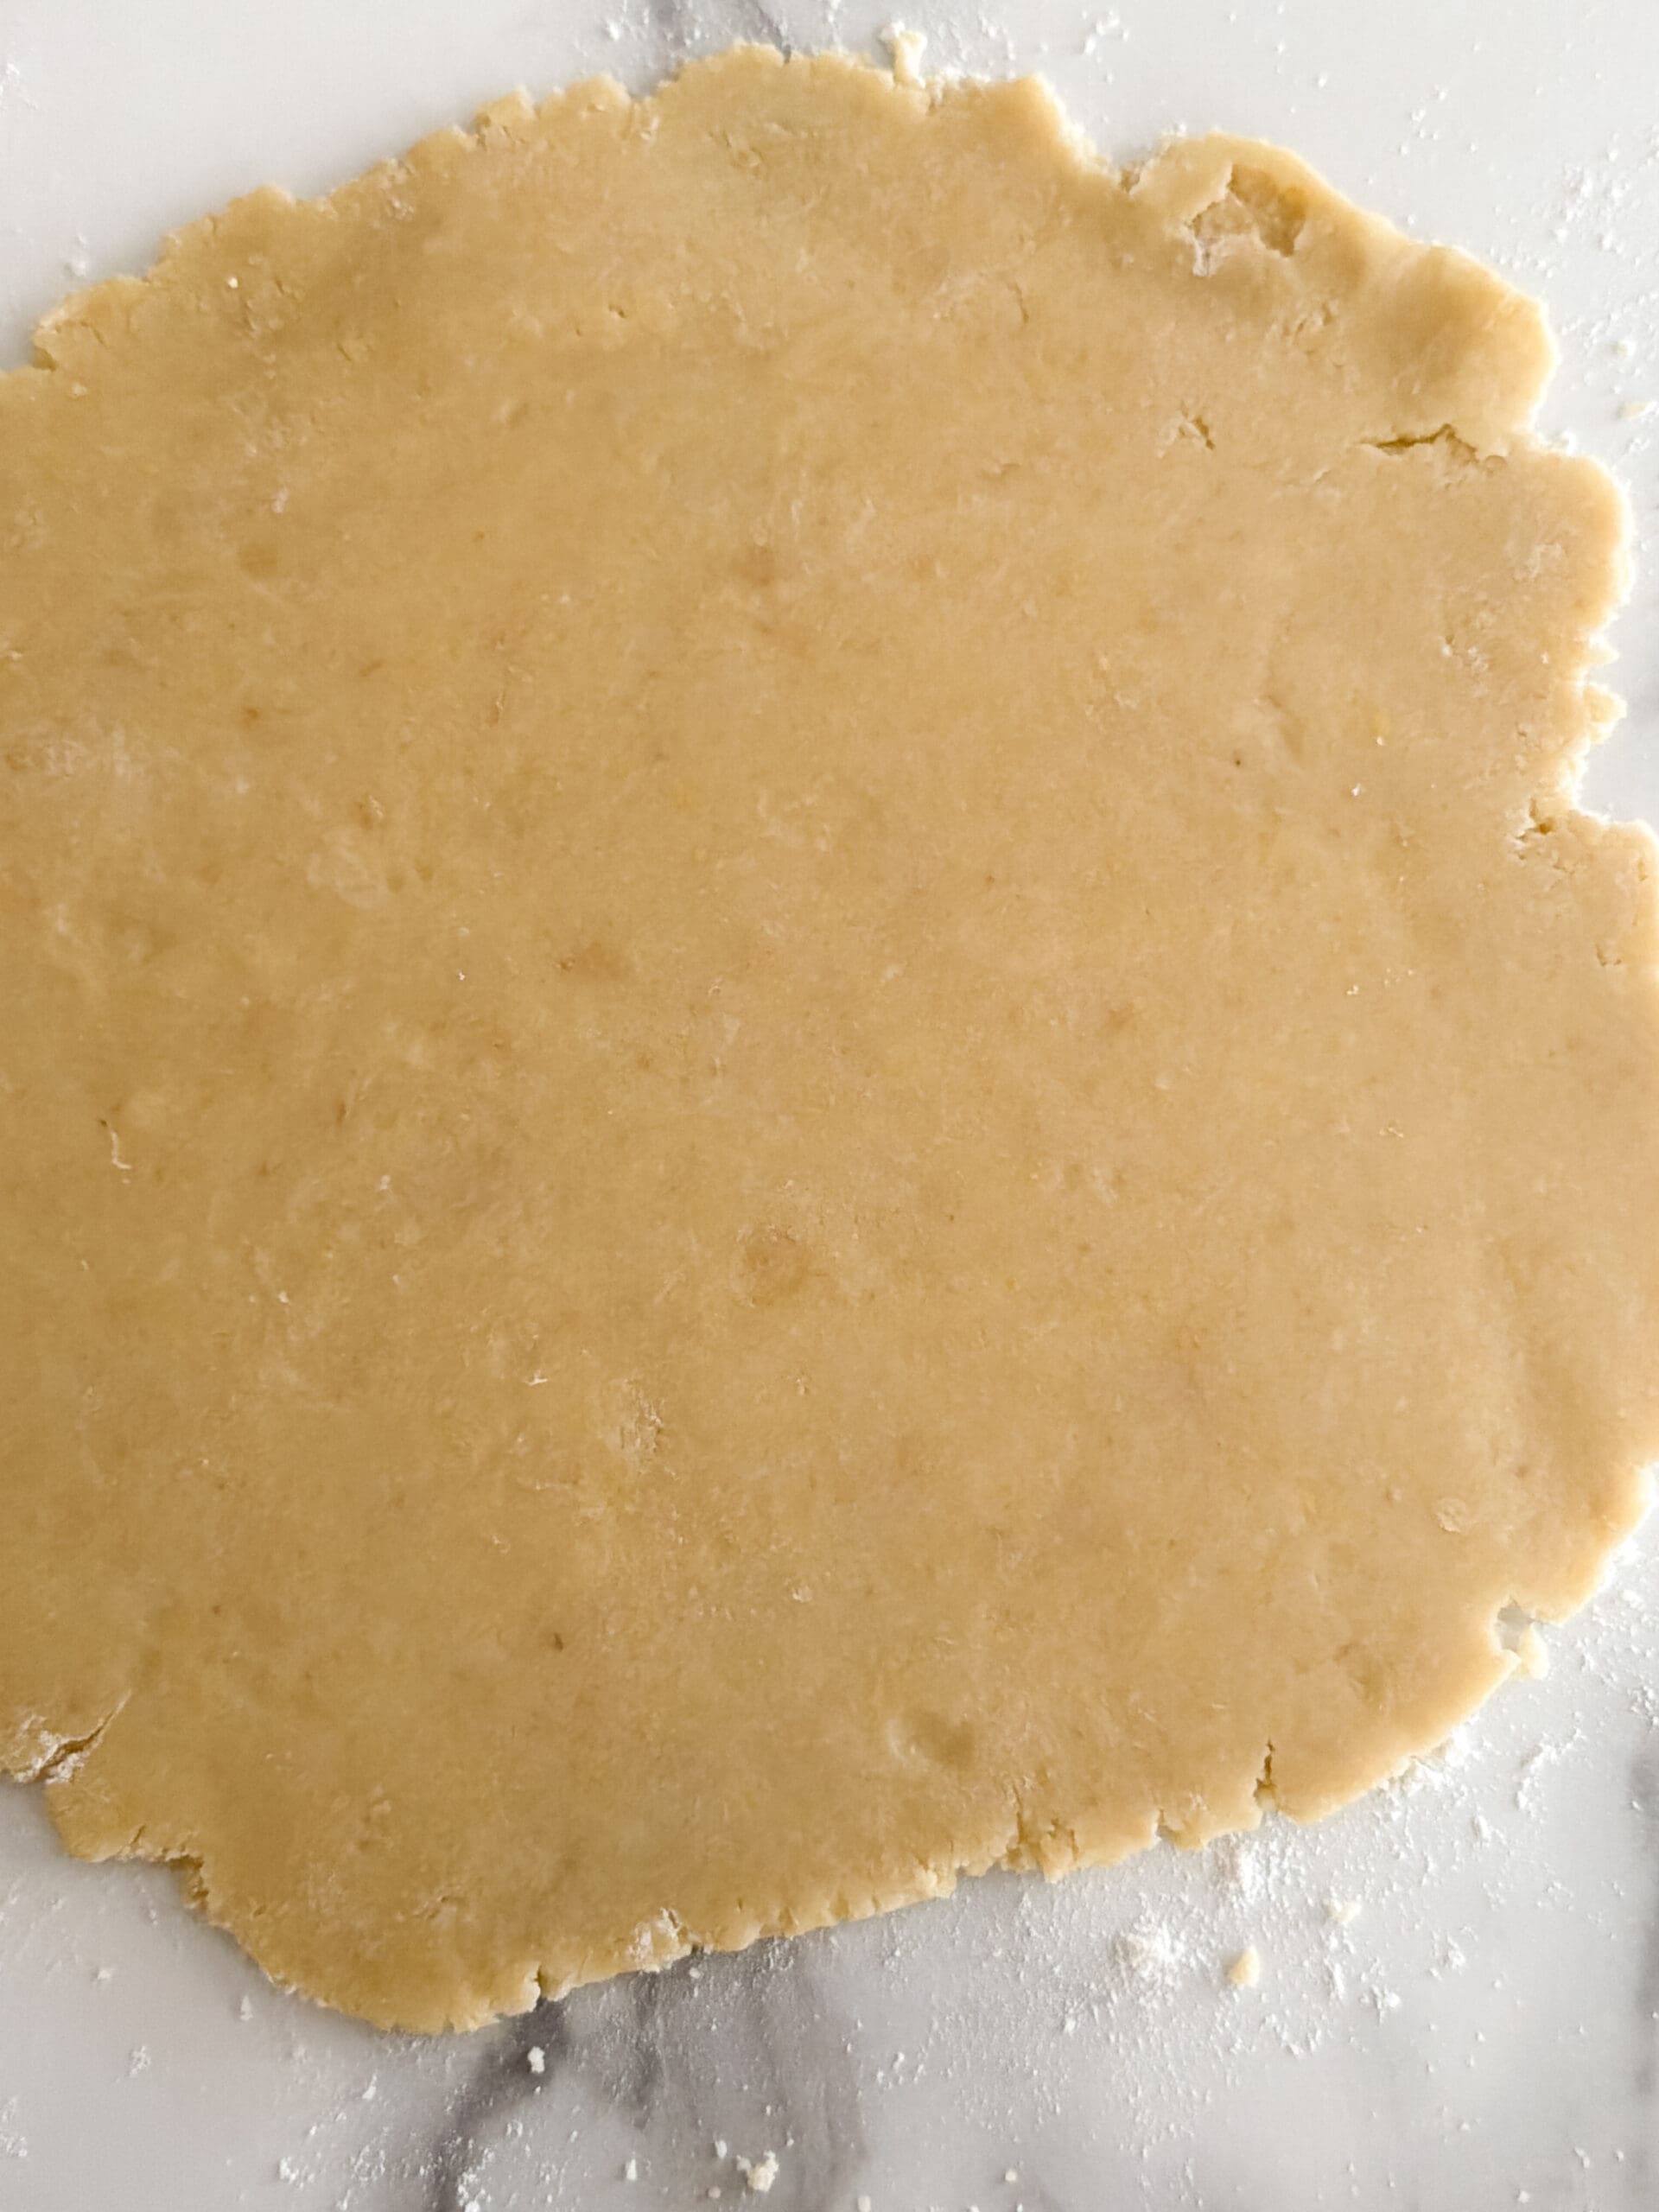
- Once the dough has rested in the fridge, you can take the dough out, unwrap it, and begin to roll it out thinly. You want to make sure to try to keep the shape round as you’re rolling and make sure you don’t go over the edges as you’re rolling, as this will result in uneven sides. If it’s too sticky for any reason, add a bit of flour to your work surface and a bit on top of the dough.
- When the dough is rolled out, use your rolling pin to wrap the dough around the pin to help lift it to your prepared tart pan. Begin to flatten the bottom and sides with your fingers, and then use a measuring cup to flatten as needed. Use a paring knife to cut off any excess dough hanging off the edges. Try to get the dough as flat and even as possible so it bakes evenly. Use a fork to dock the bottom of the dough and some of the sides. Docking the dough prevents steam from being trapped in the dough, so it won’t bubble up as it bakes. Brush with the beaten egg white.

- Bake at 400 for around 10 minutes or until baked and lightly golden brown. After baking, set it to the side to cool while you work on the filling. Turn the oven down to 350F and keep the oven on so it’s preheated for the tart.

Filling:
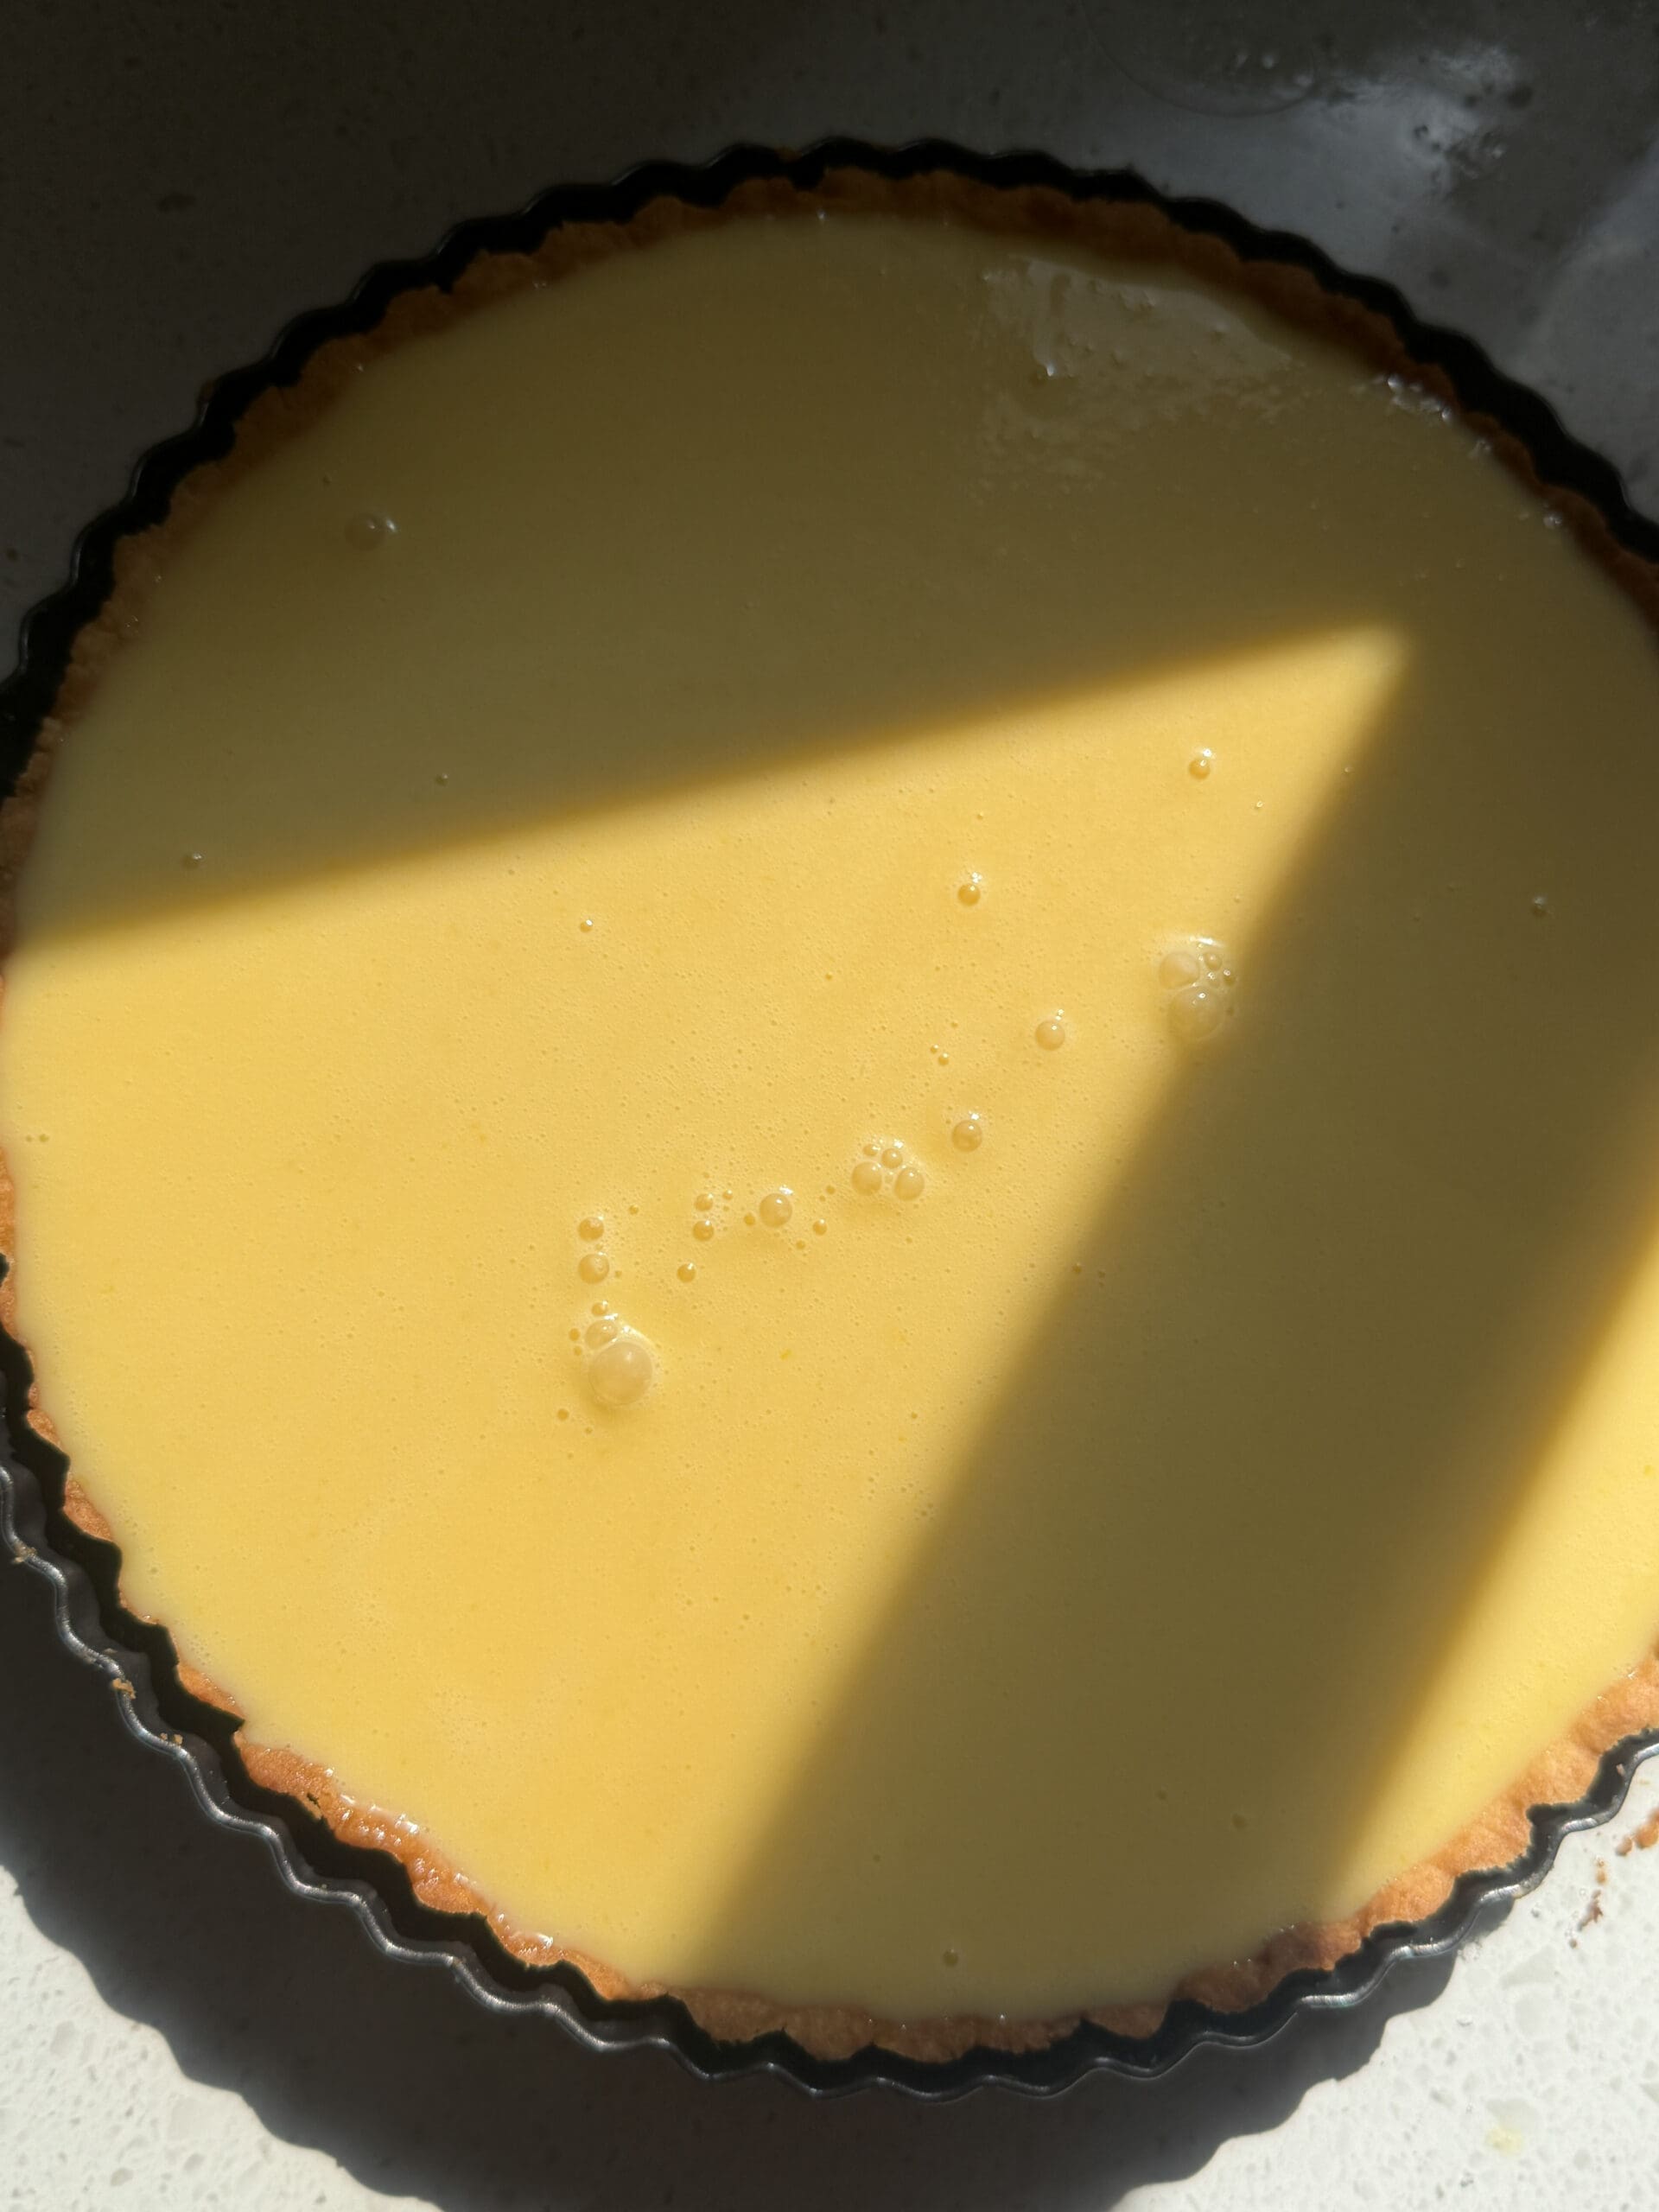
- In a medium bowl, combine the eggs, sugar, salt, lemon zest, lemon juice, vanilla extract, and heavy cream. Place the tart pan on a baking sheet and then, pour the filling mixture through a sieve into the cooled baked crust. There will likely be extra filling mixture, which you can refrigerate for later use for mini tarts for example.
Baking and Serving:
- Bake for around 30-40 minutes at 350°. Like all baked custards, you want to make sure the outer areas are set, but the center should be set enough but, it still jiggles slightly when gently shaken. When you poke it with your finger, it should be no longer liquid and will be set.

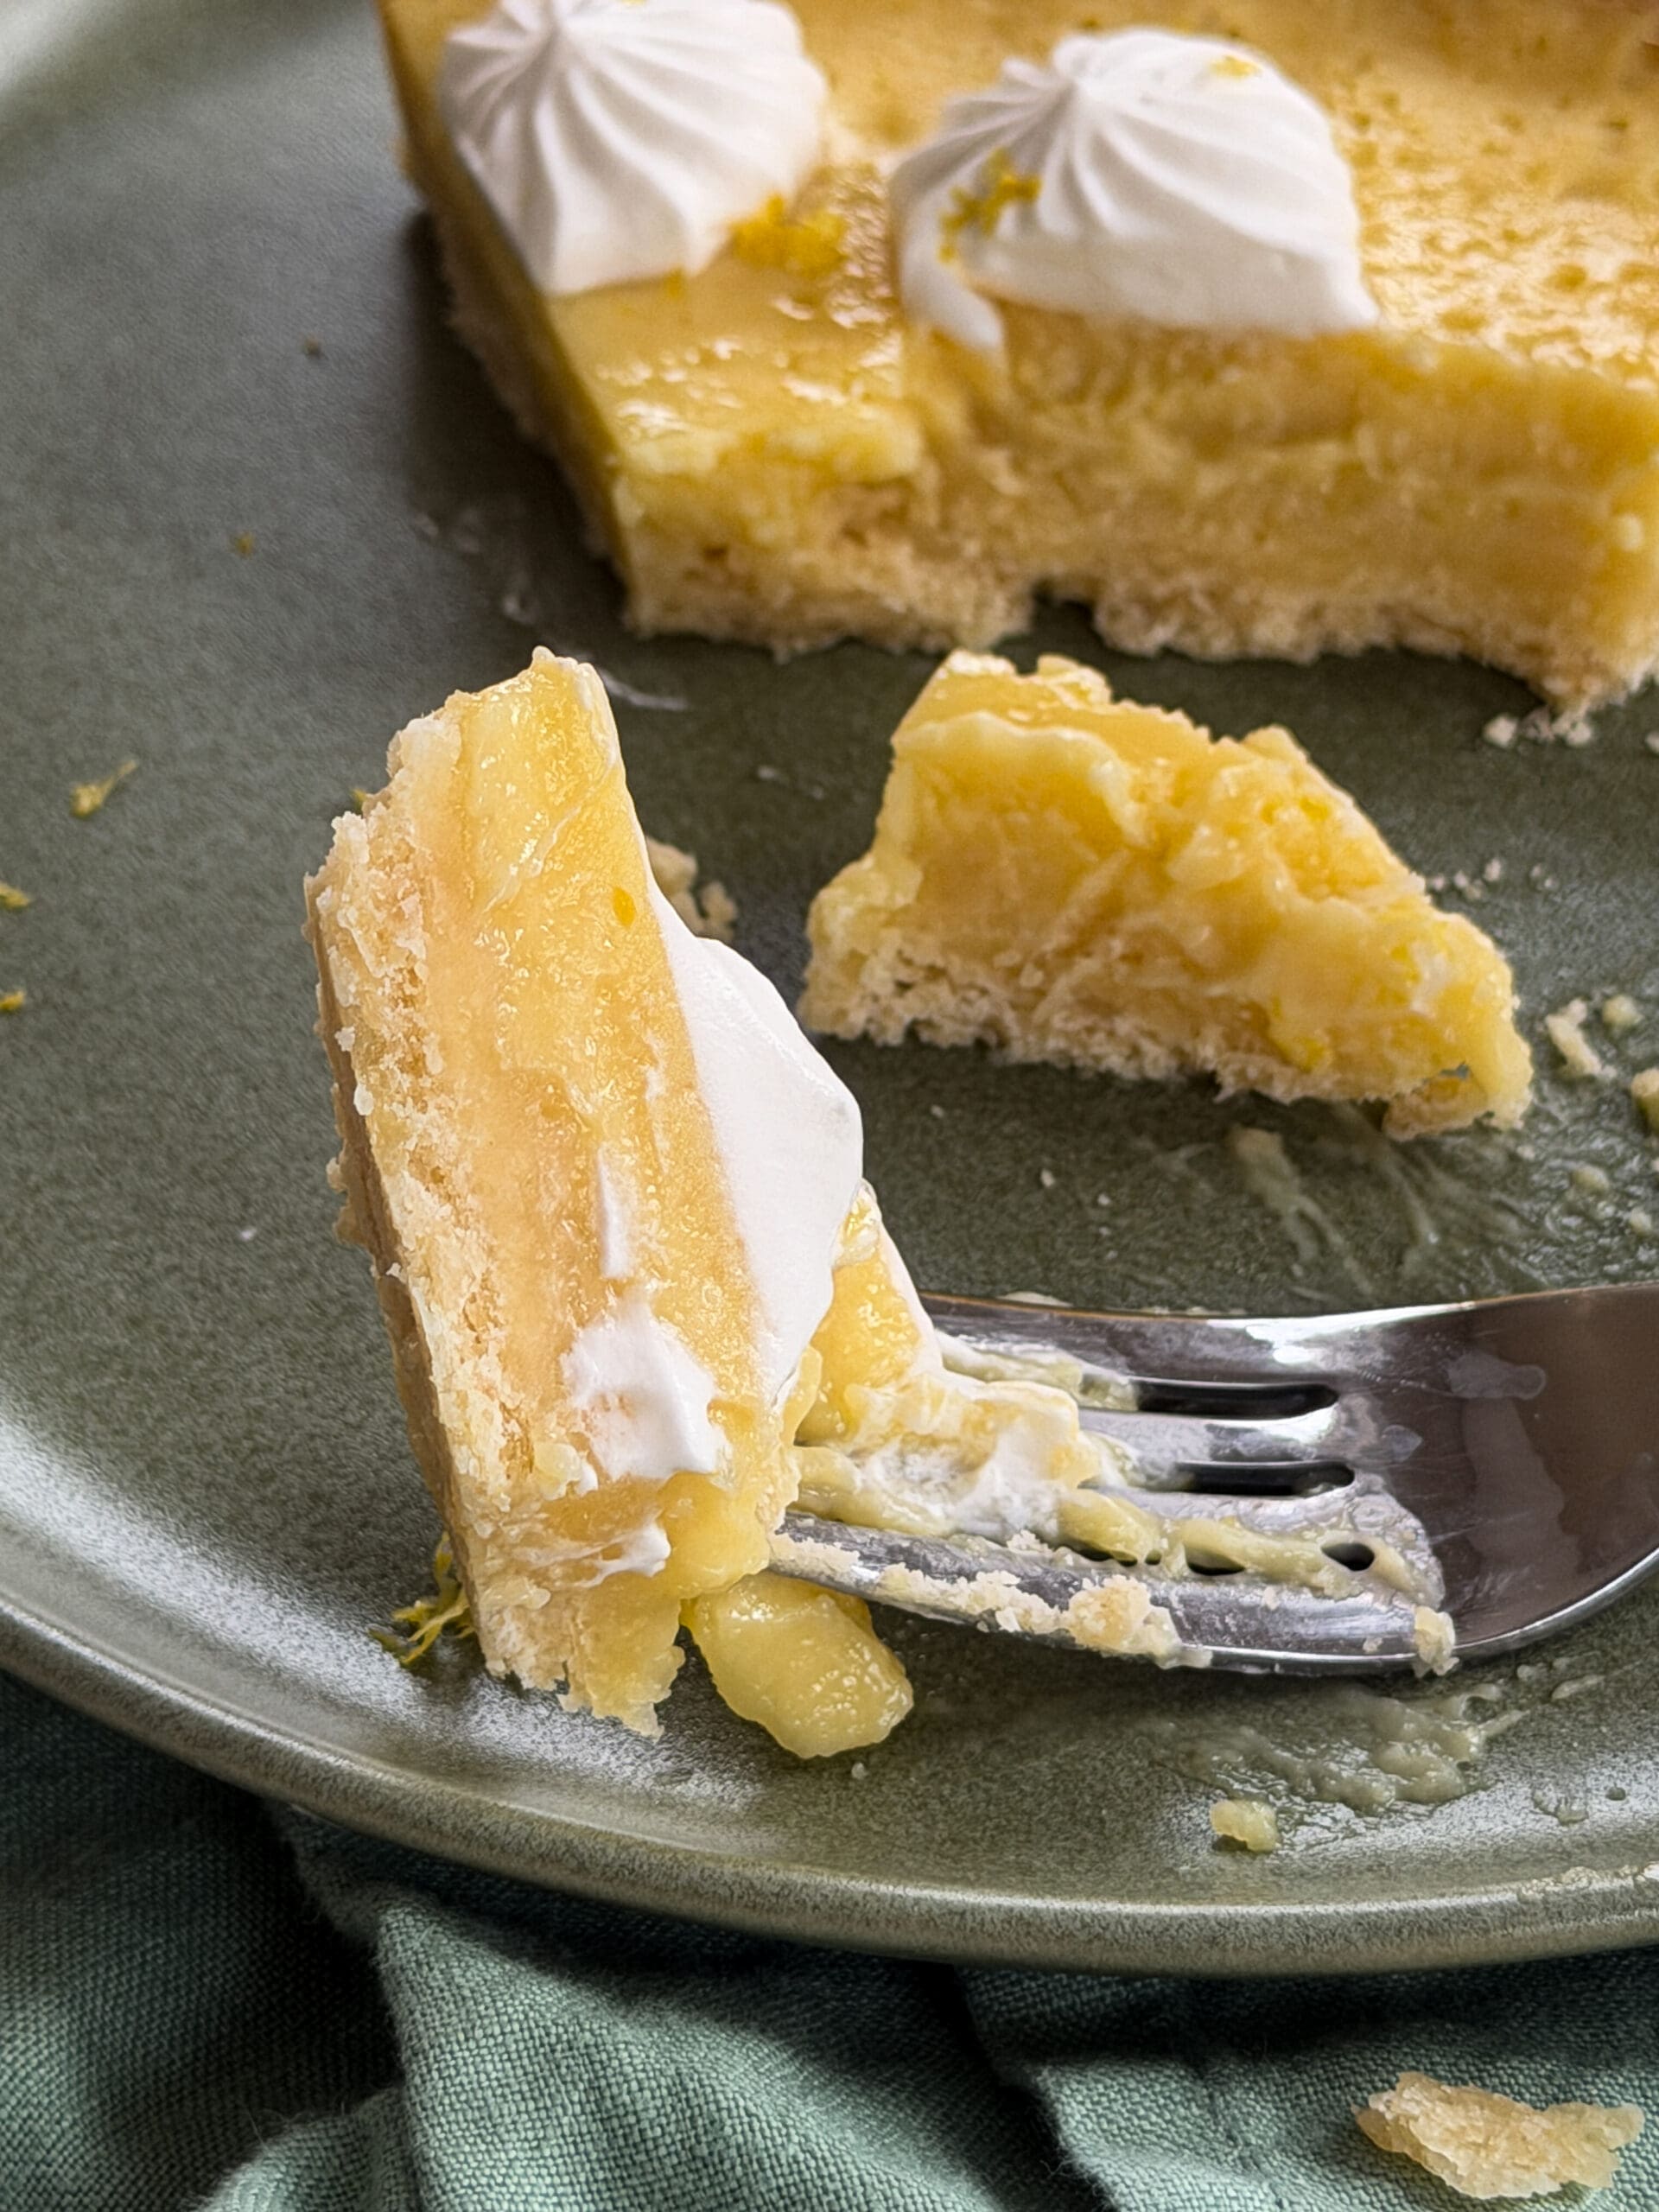
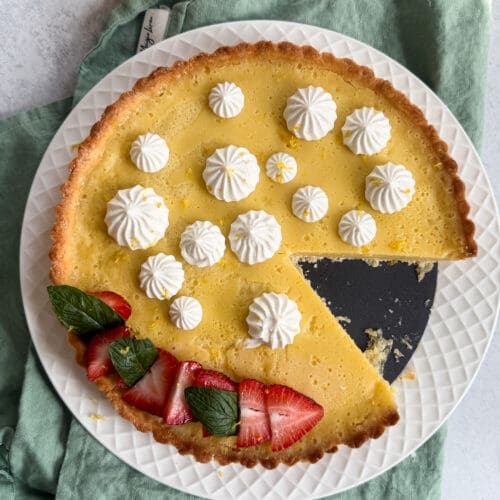
- After it’s done, let it cool for around 20 minutes, then wrap, not letting the surface touch the plastic wrap (it will stick to the plastic if it does touch), and cool for at least four hours to cool and set up properly. Serve cold or at room temperature, decorated with some whipped cream and fresh berries.


Enjoy!
Similar Recipes
SHOP MY BAKING ESSENTIALS:
GET ON THE LIST
Classic Lemon Tart
Ingredients
Crust:
- 1 1/3 Cup All-Purpose Flour
- 2 Tablespoons Sifted Powdered Sugar
- 6 oz Unsalted Softened Butter
- 1 Tablespoon Cold Water
- 1 Egg Yolk
- small pinch salt
Egg Wash:
- 1 egg white for brushing onto crust before oven
Filling:
- 3 large Lemons zested and juiced
- 6 Whole Eggs room temperature
- 1 1/4 Granulated Sugar add only 1 cup if you like it more tart
- 1 Cup Heavy Cream room temperature
- 1 Teaspoon Vanilla Extract
- small pinch salt
Instructions
Prep:
- Prep your tart pan by greasing it with butter and cooking spray. I didn’t find it necessary to use a parchment round as well, but you can if you’d like.
Crust:
- For the crust, combine all the crust ingredients in your food processor and mix just until combined. Don’t overmix it. The mixture will still look very crumbly, but it will come together when we form it into a ball to refrigerate it, so don’t let that concern you.
- Dump the mixture out onto a sheet of plastic wrap and begin to bring it together so it’s a ball. Forming it into a ball now will make it easier to roll out later. Make sure it’s fully enclosed in the plastic wrap and refrigerate for at least 30 minutes or one hour. This will allow the flour to absorb into the dough and let the dough relax, making for better flavor and making it easier to roll. In the meantime, turn your oven on to preheat at 400F.
- Once the dough has rested in the fridge, you can take the dough out, unwrap it, and begin to roll it out thinly. You want to make sure to try to keep the shape round as you’re rolling and make sure you don’t go over the edges as you’re rolling, as this will result in uneven sides. If it’s too sticky for any reason, add a bit of flour to your work surface and a bit on top of the dough.
- When the dough is rolled out, use your rolling pin to wrap the dough around the pin to help lift it to your prepared tart pan. Begin to flatten the bottom and sides with your fingers, and then use a measuring cup to flatten as needed. Use a paring knife to cut off any excess dough hanging off the edges. Try to get the dough as flat and even as possible so it bakes evenly. Use a fork to dock the bottom of the dough and some of the sides. Docking the dough prevents steam from being trapped in the dough, so it won’t bubble up as it bakes. Brush with the beaten egg white.
- Bake at 400 for around 10 minutes or until baked and lightly golden brown. After baking, set it to the side to cool while you work on the filling. Turn the oven down to 350F and keep the oven on so it’s preheated for the tart.
Filling:
- In a medium bowl, combine the eggs, sugar, salt, lemon zest, lemon juice, vanilla extract, and heavy cream. Place the tart pan on a baking sheet and then, pour the filling mixture through a sieve into the cooled baked crust. There will likely be extra filling mixture, which you can refrigerate for later use for mini tarts for example.
Baking and Serving:
- Bake for around 30-40 minutes at 350°. Like all baked custards, you want to make sure the outer areas are set, but the center should be set enough but, it still jiggles slightly when gently shaken. When you poke it with your finger, it should be no longer liquid and will be set.
- After it’s done, let it cool for around 20 minutes, then wrap, not letting the surface touch the plastic wrap (it will stick to the plastic if it does touch), and cool for at least four hours to cool and set up properly. Serve cold or at room temperature, decorated with some whipped cream and fresh berries.
- Enjoy!
Notes
- Serve within the first few days.
- Garnish with cream and fresh berries if you’d like or even just powdered sugar.