Light & Fluffy Angel Food Cake
Angel food cake can get a bad wrap sometimes. It's one of the older cakes in our history and it shows. People say it's too complicated, bland, and boring. Well, I set out to flip the script on that old narrative. Angel food cake does not have to be complicated, bland, or boring. This recipe makes the process incredibly easy and it yields a light and fluffy cake that is full of flavor. This isn't the same old cake you're used to. It's a modern angel food cake that's so easy to make and absolutely delicious.
REASONS YOU SHOULD TRY THIS RECIPE:
- Not your typical angel food cake process - much easier!
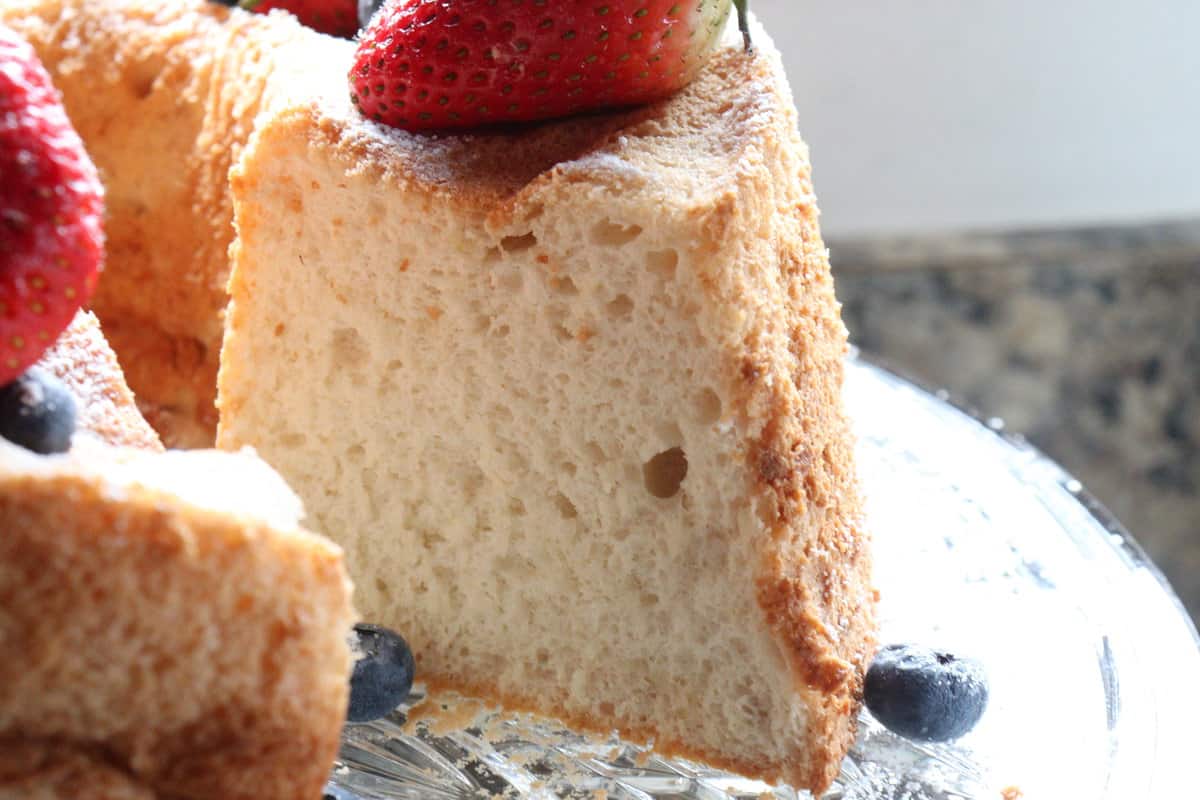
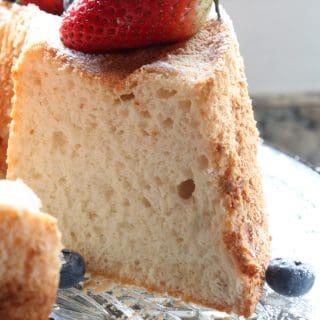
- Tastes great and has a soft fluffy texture
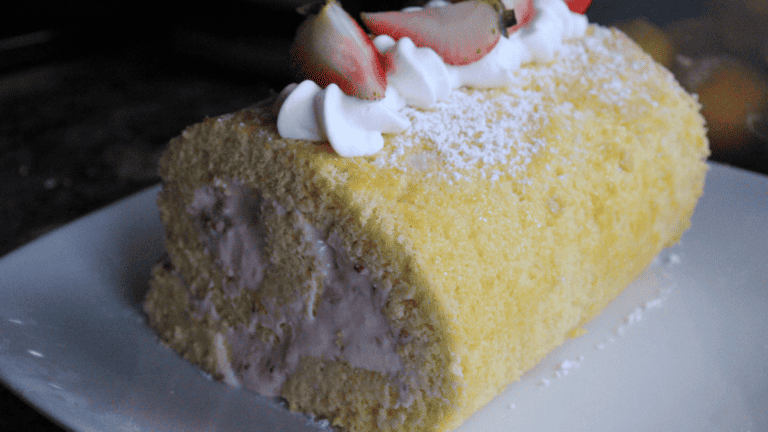
- Lighter cake that goes great with fruit
I don't like hyperbole so I tend to stay away from calling any recipe the "best." But in my humble opinion, this recipe may be the best angel food cake recipe. What makes this the best? Well, let's talk about it.
1.) Typically and traditionally, this cake is very finicky. It's a technical recipe, to say the least. The ingredients have to be at room temperature and then you have to fight the elements of your environment to get the perfect meringue. After achieving that, you have to fold in that meringue while maintaining the volume. You put it in the oven and pray it comes out well and doesn't collapse. It's just too much. My recipe doesn't require any of that hassle. I've made this with cold eggs. Yes, you've read that right...cold eggs. I know that goes against every conventional baking lesson we've ever had, but it's true. Also, I made this cake when it was very humid outside, again, I had no issues. Because we're only beating to medium peaks, the meringue is not as temperamental. Beating to medium peaks is the perfect compromise for those who are adamant that soft peaks are the way to go or stiff peaks are the way to go, which is a hotly contested issue among recipe developers.
2.) In the first point, I mentioned that we don't have to wait until the ingredients are at room temperature. That's because, with our method, we're able to achieve the meringue peaks we want whether the eggs are cold or not.
3.) Dump it in. That's right. Our first step is literally to dump in the egg whites, granulated sugar, lemon juice, and vanilla extract all in one bowl. Again, I know that goes against the conventional method of gradually adding the sugar to the egg whites but trust me...it works. And, it's much easier!
4.) Flavortown! Angel food cake doesn't have to be boring. With the addition of powdered sugar, vanilla extract, lemon zest and juice, and almond extract, this cake has so much flavor. It's perfectly sweetened and is also a great canvas for whatever you choose to accompany it with. It's honestly even great alone. I've hyped this recipe enough. Let me explain how we do it.
HOW TO MAKE LIGHT AND FLUFFY ANGEL FOOD CAKE:
- Please read carefully: First, we'll get the little prep work that is required out of the way. For this cake, you can only make it in a special pan called a tube pan. It's also alternatively known as an angel food cake pan. They come in two different varieties. There is one pan design that has a removable bottom. The other doesn't. For this cake, we leave the pan ungreased. That means no cooking spray, butter, flour...nothing! For the removable cake pan, there is no prep. Just leave it ungreased and you're ready to go. For the pan without the removable bottom, we'll want to place a parchment circle on the bottom of the pan to prevent sticking. That's it. Do not grease the pan. Just place the circle on the bottom and that's it for your pan prep. After your pan is prepped, preheat your oven to 350°F. Lastly, prep a sheet pan with a wire rack sitting atop it.
- Now that we're done with the equipment prep, we can prep with the ingredients.
Meringue & Cake
- First, you want to zest your lemon and set the zest aside. After zesting the lemon, you can cut it in half. We'll use one half to wipe down our mixing bowl and the other half for the recipe. The mixing bowl must be very clean for the meringue to work. To do that, you wash it, dry it, and wipe it down with half of a lemon. With a dry paper towel, wipe out the bowl again and that's ready to go.
- Next, measure out and sift your cake flour twice. Do the same with your powdered sugar. Make sure to measure again after sifting to ensure the amounts are correct. Combine the flour and powdered sugar in a bowl and set aside.
- Next, you want to separate your eggs so that we only have egg whites in a clean bowl. You can keep the yolks and use them for ice cream, custard, or a mousse.
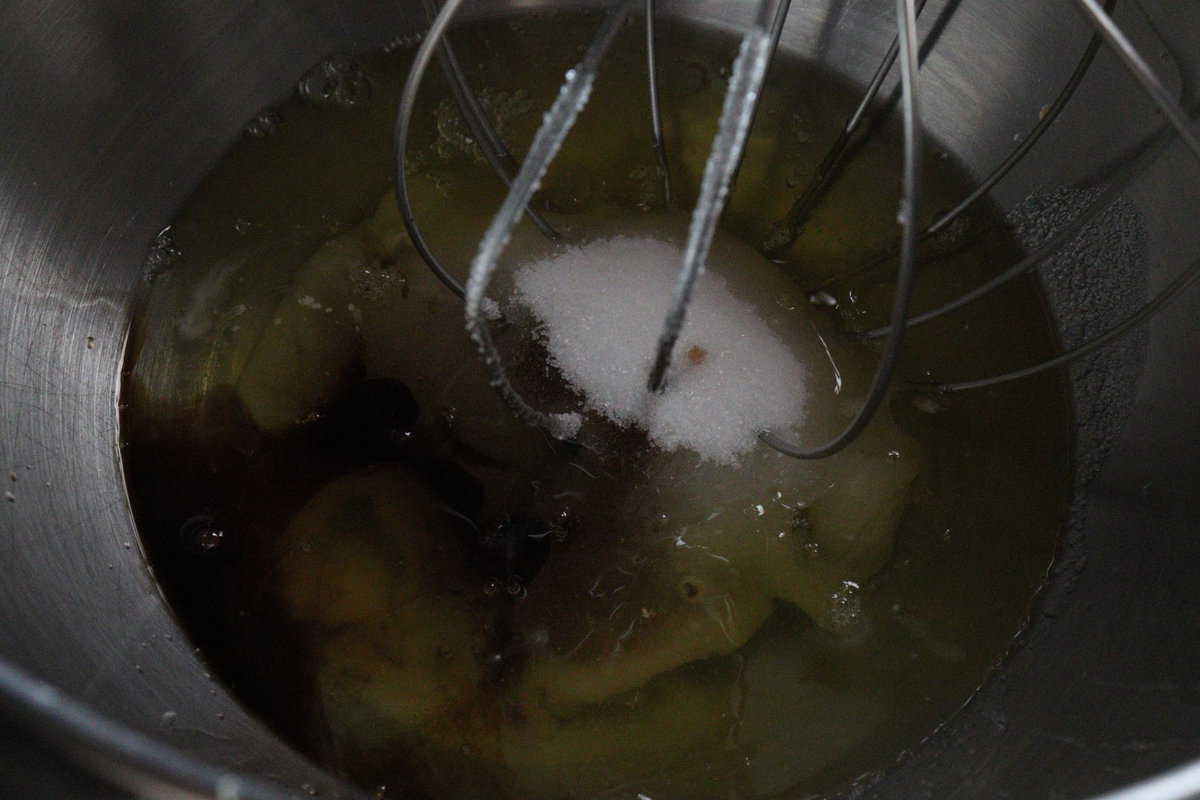
- Now, combine the egg whites, vanilla extract, almond extract (optional), granulated sugar, and lemon juice in the bowl of your stand mixer. Whip on low (2 on the KitchenAid) for one minute. After a minute and without stopping the mixer, turn it up to medium speed (4 on the KitchenAid) and whip for 3 minutes.
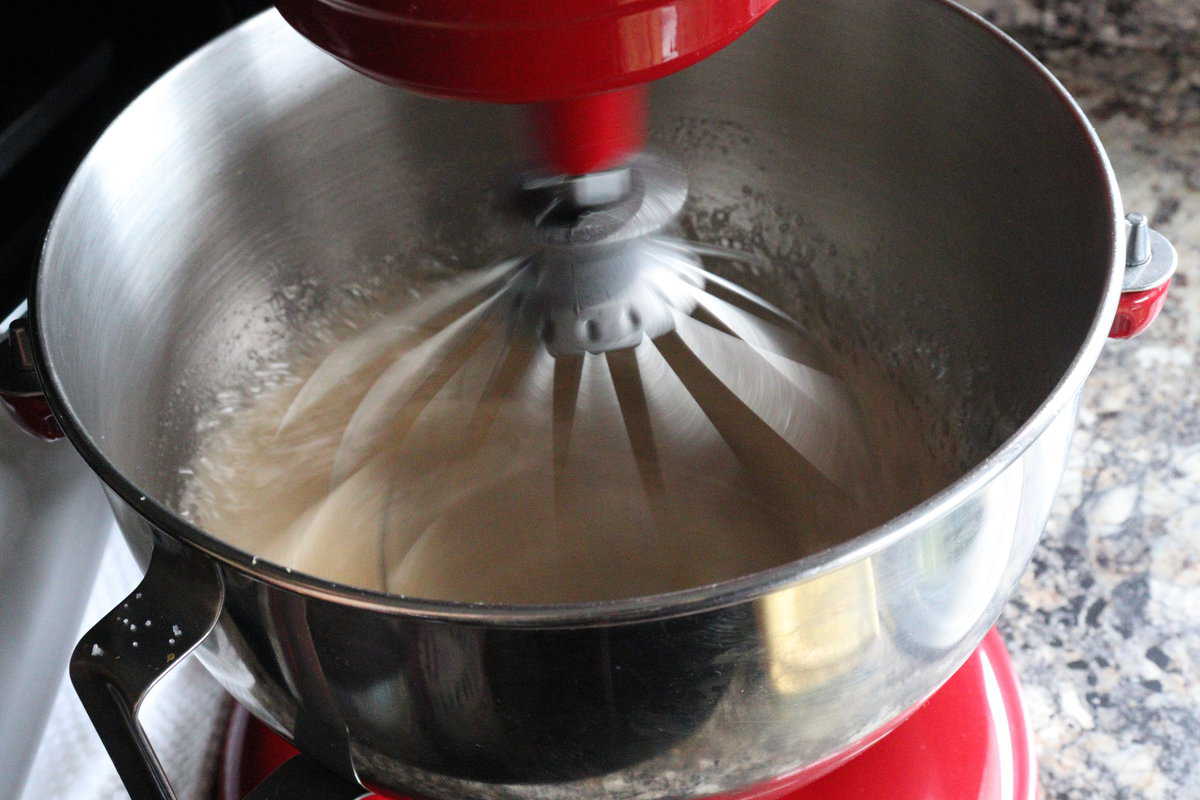
- Then, after three minutes, add in the salt all at once and again without stopping the machine, continue to whip turning the speed up to medium-high speed (6 on the KitchenAid), and whip for an additional 3 minutes.
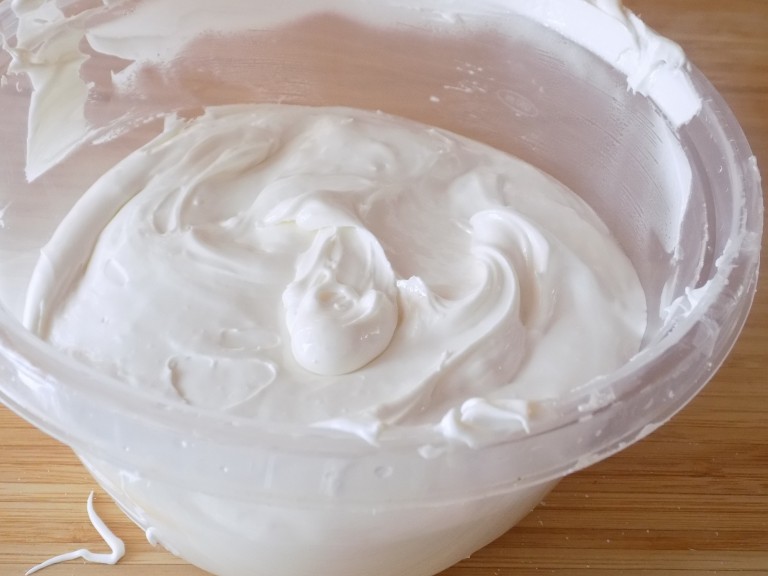
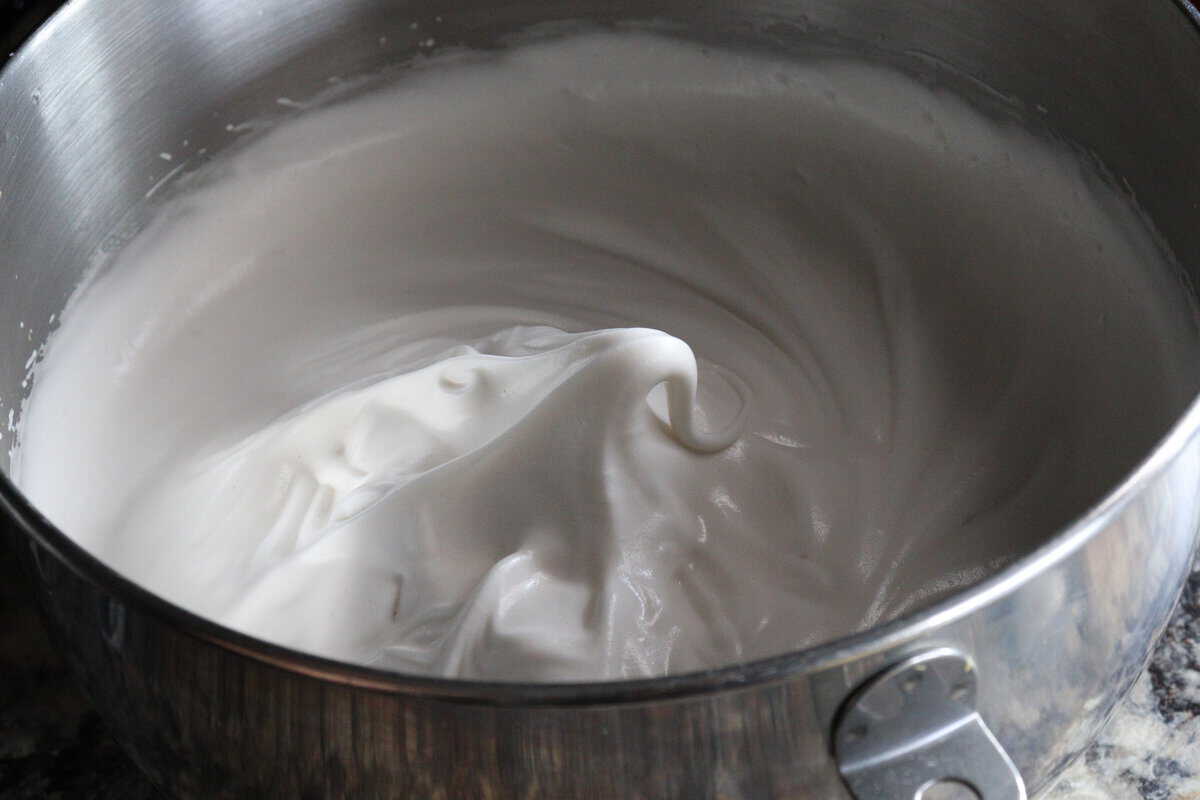
- After that, turn it up to the highest speed (8 on the KitchenAid) and whip for 1 ½ - 2 minutes or until you reach medium peaks. You'll start to notice the meringue whiten, and grow in volume and tracks will begin to form. That's how you can tell you're close. A medium peak should hold its shape well, except the tip of the peak will curl on itself when the beater is lifted.
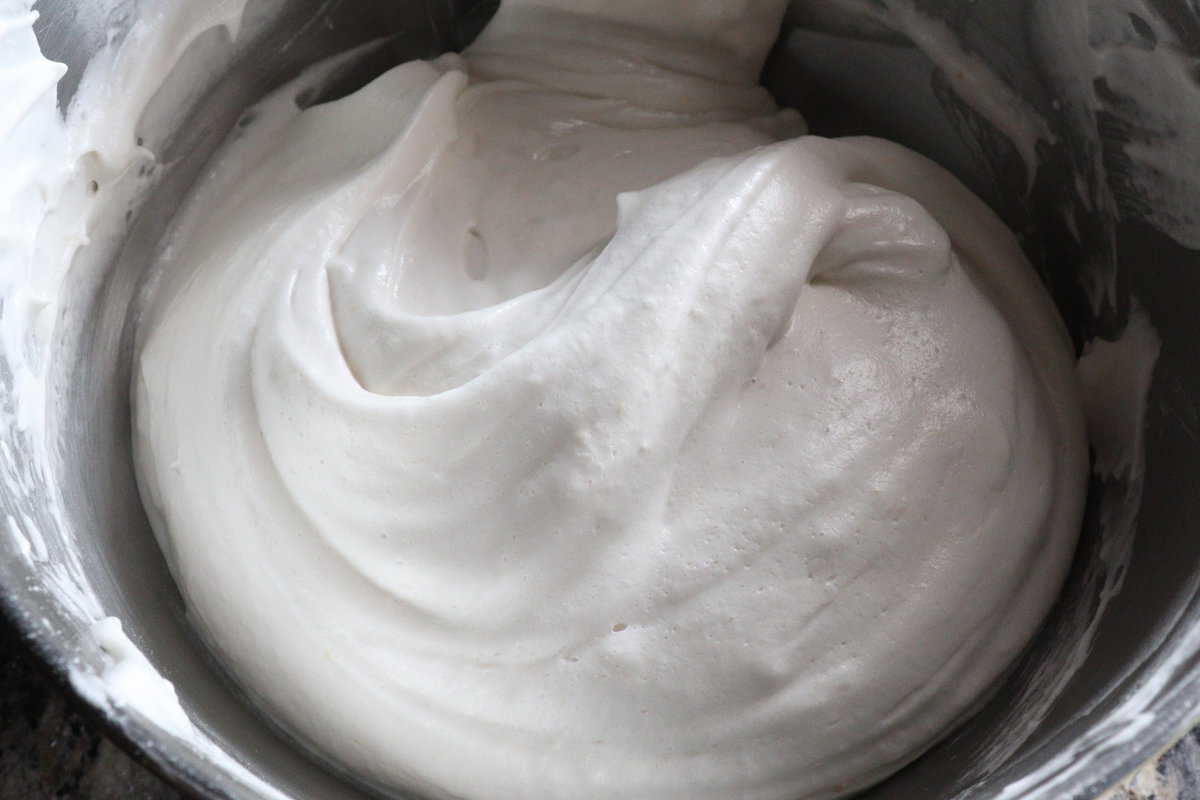
- Once you reach medium peaks, turn the machine off and immediately take the bowl off the stand. Add in the lemon zest and sift in the flour/powdered sugar mixture in two additions, folding completely between each addition. This will prevent any lumps in the batter.
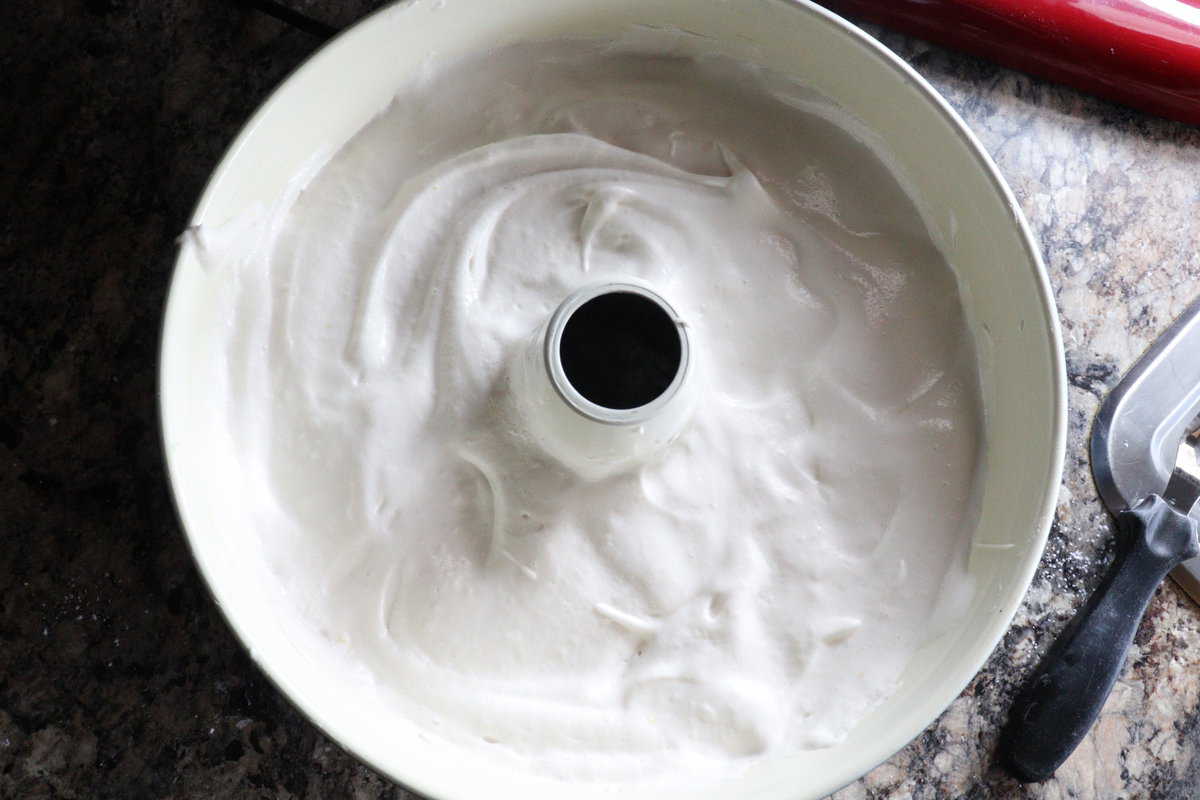
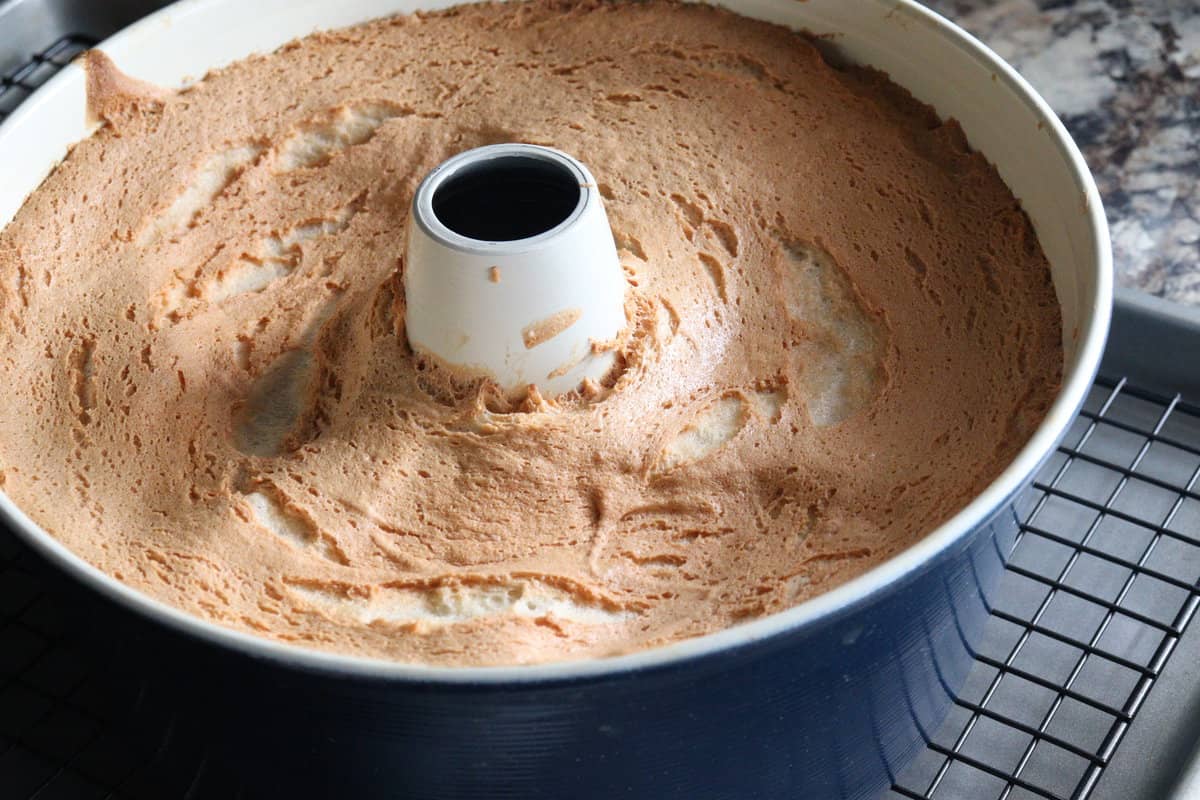
- Once the batter is properly mixed, gently pour out half of the batter into your prepared pan. Then use an offset spatula to gently and evenly spread the batter. This process will help in preventing air pockets. Once that's done, we can add the rest of the batter. Again, use your offset spatula to gently and evenly spread out the batter so there's a flat top. Use a knife or your spatula to cut twice in the batter and then gently tap the pan on the counter while giving it a gentle spin afterward. This process will get rid of any excess air bubbles.
Baking
- Bake at 350°F for 35-40 minutes or until the cake is golden brown and springs back to the touch. Immediately out of the oven, flip the cake pan upside down onto your wire rack so it can cool. If you don't do this immediately, your cake will collapse onto itself. Please note that the cake will shrink in the oven and out of the oven, that's normal.
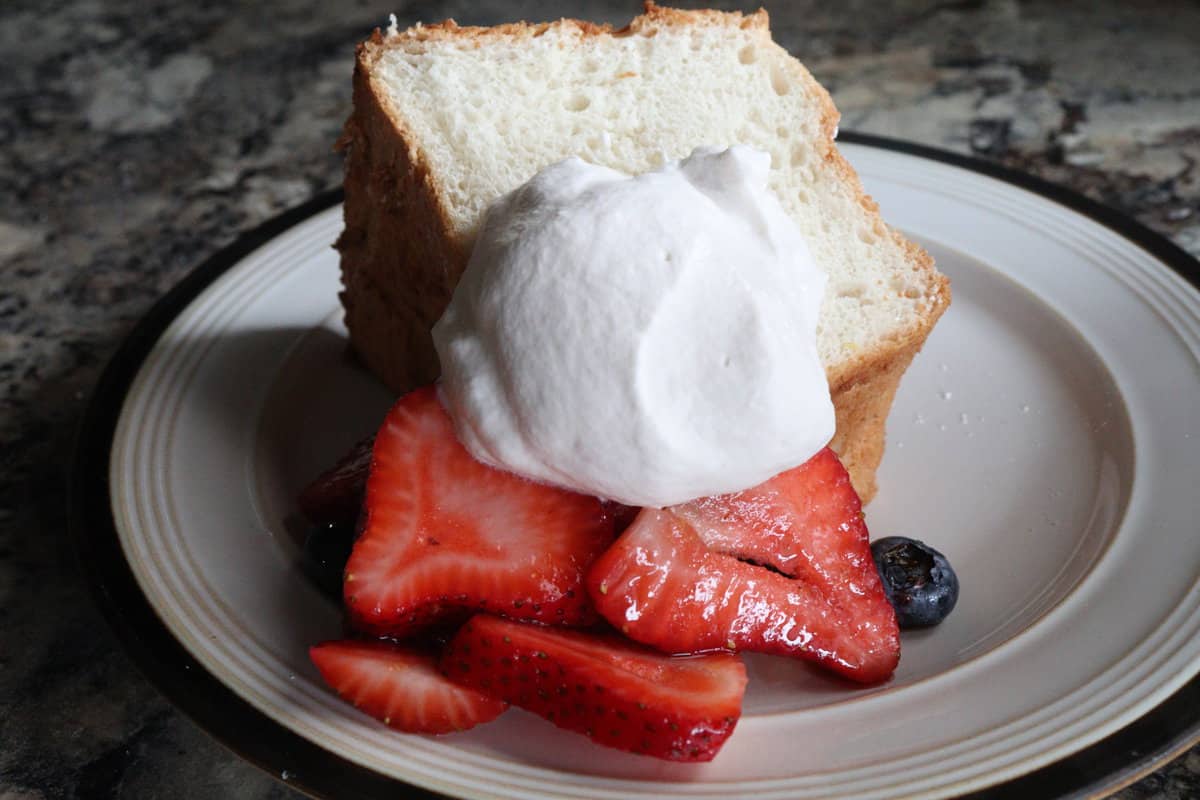
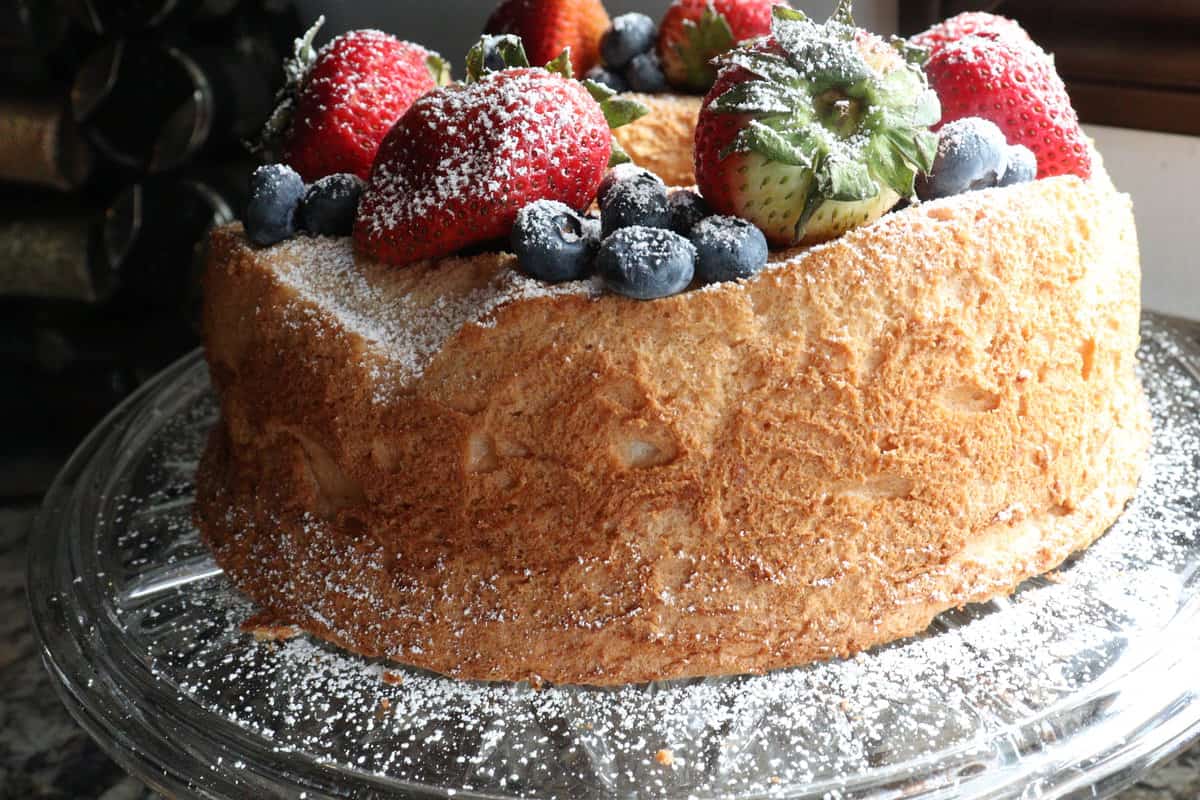
- After allowing the cake to cool for at least an hour, use a pairing knife or your offset spatula to go around the edges and begin to unmold. Peel the parchment off gently (if applicable). Decorate as you wish and use a serrated knife to slice and serve.

SOME MORE GREAT LIGHT AND FLUFFY CAKE RECIPES:
Angel Food Cake (Light & Fluffy)
Ingredients
- 8 oz granulated sugar
- 1 oz powdered sugar sifted
- 3 oz cake flour sifted
- 11 egg whites
- 1 medium lemon zest
- 1 half medium lemon juice
- 1 ¼ teaspoon salt
- 2 teaspoons vanilla extract
- ½ teaspoon almond extract optional
Instructions
- For this cake, you can only make it in a special pan called a tube pan. It's also alternatively known as an angel food cake pan. They come in two different varieties. There is one pan design that has a removable bottom. The other doesn't. For this cake, we actually leave the pan ungreased. That means no cooking spray, butter, flour...nothing! For the removable cake pan, there is no prep. Just leave it ungreased and you're ready to go. For the pan without the removable bottom, we'll want to place a parchment circle on the bottom of the pan in order to prevent sticking. That's it. Do not grease the pan. Just place the circle on the bottom and that's it for your pan prep. After your pan is prepped, preheat your oven to 350°F. Lastly, prep a sheet pan with a wire rack sitting atop it.
- First, you want to zest your lemon and set the zest aside. After zesting the lemon, you can cut it in half. We'll use one half to wipe down our mixing bowl and the other half for the recipe. It's important that the mixing bowl is very clean in order for the meringue to work. To do that, you wash it, dry it and wipe it down with half of a lemon. With a dry paper towel, wipe out the bowl again and that's ready to go.
- Next, measure out and sift your cake flour twice. Do the same with your powdered sugar. Make sure to measure again after sifting to ensure the amounts are correct. Combine the flour and powdered sugar in a bowl and set aside.
- Next, you want to separate your eggs so that we only have egg whites in a clean bowl.
- Now, combine the egg whites, vanilla extract, almond extract (optional), granulated sugar, and lemon juice in the bowl of your stand mixer. Whip on low (2 on the KitchenAid) for one minute. After a minute and without stopping the mixer, turn it up to medium-speed (4 on the KitchenAid) and whip for 3 minutes.
- After three minutes, add in the salt all at once and again without stopping the machine, continue to whip turning the speed up to medium-high speed (6 on the KitchenAid), and whip for an additional 3 minutes.
- After that, turn it up to the highest speed (8 on the KitchenAid) and whip for 1 ½ - 2 minutes or until you reach medium peaks. You'll start to notice the meringue whiten, grow in volume and tracks will begin to form. That's how you can tell you're close. A medium peak should hold its shape well, except the tip of the peak will curl on itself when the beater is lifted.
- Once you reach medium peaks, turn the machine off and immediately take the bowl off the stand. Add in the lemon zest and sift in the flour/powdered sugar mixture in two additions, folding completely between each addition. This will prevent any lumps in the batter.
- Once the batter is properly mixed, gently pour out half of the batter into your prepared pan. Then use an offset spatula to gently and evenly spread the batter. This process will help in preventing air pockets. Once that's done, we can add the rest of the batter. Again, using your offset spatula to gently and evenly spread out the batter so there's a flat top. Use a knife or your spatula to cut twice in the batter and then gently tap the pan on the counter while giving it a gentle spin afterward. This process will get rid of any excess air bubbles.
- Bake at 350°F for 35-40 minutes or until the cake is golden brown and springs back to the touch. Immediately out of the oven, flip the cake pan upside down onto your wire rack so it can cool. If you don't do this immediately, your cake will collapse onto itself. Please note that the cake will shrink in the oven and out of the oven, that's normal.
- After allowing the cake to cool for at least an hour, use a pairing knife or your offset spatula to go around the edges and begin to unmold. Peel the parchment off gently (if applicable). Decorate as you wish and use a serrated knife to slice and serve.